Showing posts with label Budget meals. Show all posts

Wednesday, April 10, 2013

School Recess ideas - Brownie Cookies

One thing that has challenged me recently is the whole concept of what to put in the kids' lunchboxes for their recess. I tend to have the lunches down pat or they are getting used to making their own - yippee!! I want to cut down on the package foods that are so easy to purchase, but aren't really good for them and are really expensive when you think about it. Even if you are an Aldi shopper, if you add up your what you spend on snacks for school and at home you could be a little shocked.

I have really thought a lot about this lately because my grocery bills were getting higher and higher and I was realizing that my kids were always saying that they were hungry and couldn't find anything to eat. I thought I was being creative with my purchasing, but when I thought about it, I was just buying crap that wasn't good for them. That being said, I do allow some packaged crap now and then to keep me sane!! What I have realised now, is that in the desire to do better for my kids I have added to my work load - not yippee!! Well, not really. I do like to bake and baking or making your own snacks is really better for everyone in the long run, and if you do a bunch of snacks that are freezable then you really will be laughing!

As you know I have embarked on the freezer meal trail and in so doing, I have added a recess recipes that can be frozen or made the night before with ease, to my list. some recipes are from scratch and other incorporate cake and brownie mixes that can be purchased - not super natural, but super easy and sometimes you have to cut corners and make it easy for yourself. Some recipes are littler healthier than others, but at the end of the day you want to have a little control on what and how much (size portion) they consume and you can do that best if you are making them. Here in NSW, we have school holidays coming up as of next week and I will endeavour to use the holidays to make a bunch of treats that are freezer friendly so that most of next term will be sorted out - well that is the goal anyway. Cookies, slices, brownies, cakes, muffins, and cupcakes are on the list. I will post when I can and share what I am doing so that you might find something that could work for you.


I do want to share one quick recipe that I found great and my kids loved them. Making cookies from your brownie or cake mixes (store bought) is something new to me. I discovered this on Pinterest and it seems to be something that has been doing the rounds in North America for some time - why are we so slow here in Australia?? Well this inspiration led me to a blog, "I Take Joy". Sally, who is the author shares a recipe on how to use your Ghirardelli brownie mix to make cookies from it. It just so happens that Ghirardelli is the brownie mix you can get from Costco and since the box has like 6 pouches in it, I figured I can do this!! The hyperlink above takes you to the recipe, and this is the result:
I added butterscotch chips as I had a friend bring some back for me from the USA - again why don't we have these here in Australia?? I don't get it!! That being said, Nestle do sell caramel chips which is a nice change and a good alternative. The recipes yields about 30 cookies. Its so easy and it is something a little different and a lot cheaper than packaged muffin bars. Best of all my kids have been asking for them - which is what you want! If you didn't want to do the store bought brownie mix, there are dime a dozen recipes making them from scratch which you can easily find via Google.

PS, Just to be clear, these treats are in addition to their fruit break and other things like vege sticks and cheese etc.

Budget friendly Freezer Meals: Chicken Enchiladas

So hello again, I've had a bit of a blog holiday - wouldn't say it was relaxing!  Running a household with a husband and 4 kids can kind of do that to you now and then!! I have a list of things to get through today, but I decided I would write a post since I have not done so in a while, and I was getting a little sad over it ;( !! I have to say that getting organised and doing freezer meals has made my life a little easier at that busy time of the evening. Its great to know that the dinner is already done - or at least most of it is sorted out.  I have to admit that I'm not as super organised as I was earlier in the year (see previous post) but I do what I can when I can. Sometimes I find that I can make a 2 or 3 meals in an afternoon or while I am making the dinner for that night and those dinners will be either for the following days or when I need them. I recommend consuming your meals within the month or following month of making them to keep a good rotation going.

In my previous post I mention Turkey Enchiladas, but I didn't have the pictures up as my internet was playing up. These are a really great meal that most kids like and best of all, you could hide a lot of goodness in them!! I happened to purchase two turkey legs at an amazing discount so that became my meat. However, you can do this with BBQ chicken, chicken breast poached or slow cooked, or can slow cook a whole chicken. If you slow cook your own chicken you will have some amazing stock to use for something else.

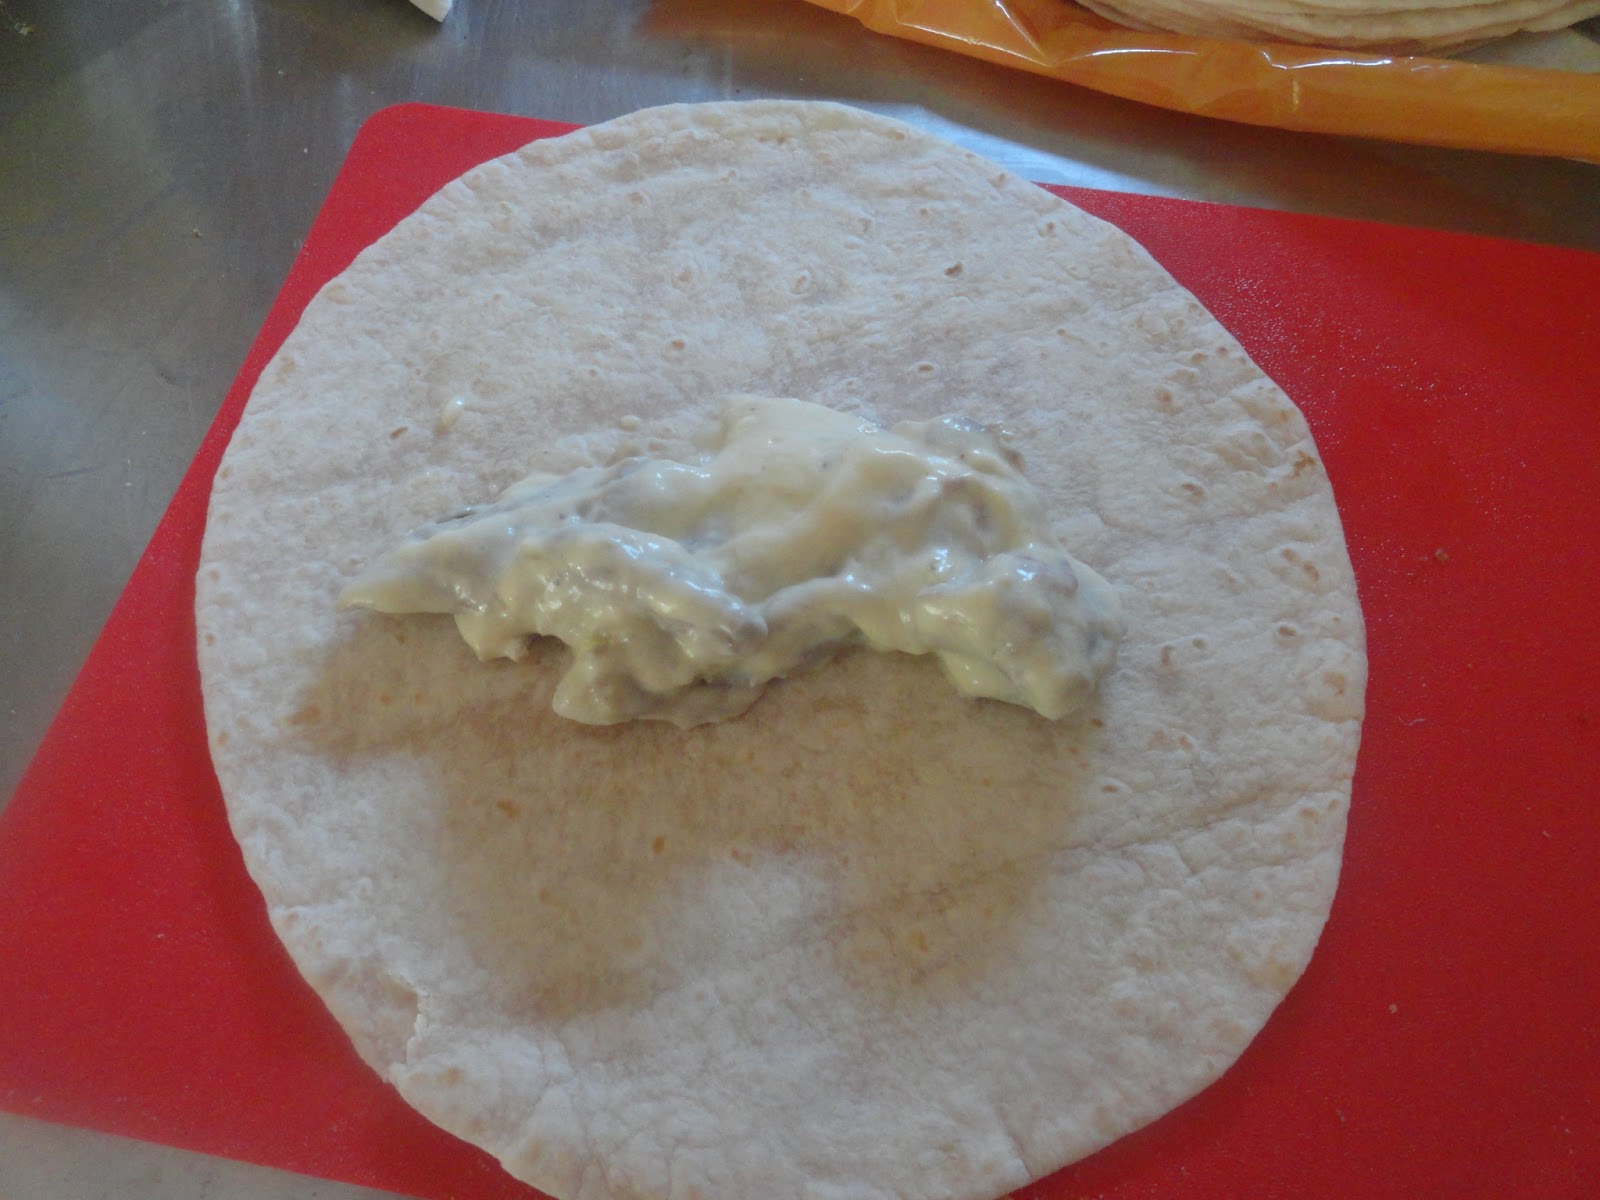
To the meat add a half cup of  light sour cream, a tin of cream of chicken or celery soup, and about a 1/4 cup of ranch dressing. The dressing is optional and you can add less or more or omit the sour cream for the ranch. You then mix this all up with a spoon until its well combined. Its at this stage that you can also add grated carrot, zucchini, diced capsicum, kidney beans or lentils, diced mushroom etc.
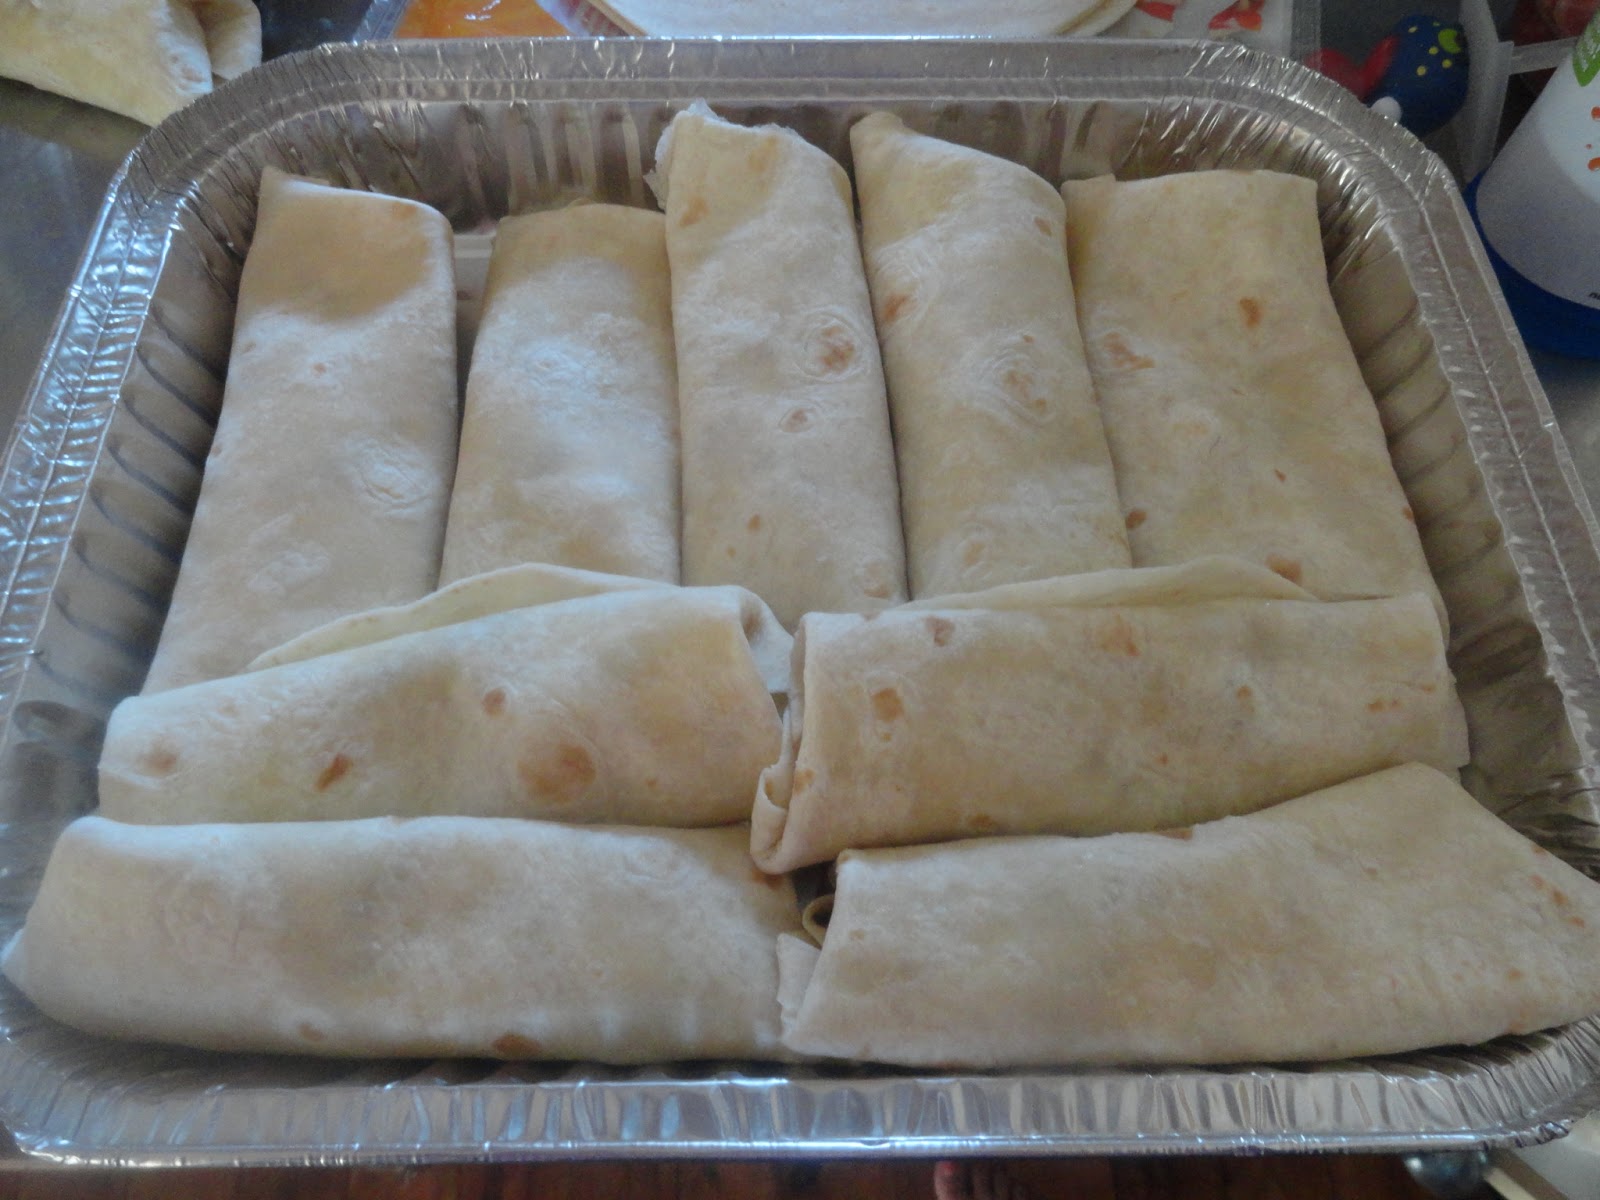
You then put the mixture on a piece of burrito bread and roll it up and fold the sides in and lay it in your tray.
If you are using this for a freezer meal, you would put the lid on your foil tray and freeze. Allow to defrost and pour salsa over the top to cover all the enchiladas - I like to be generous with my salsa. Sprinkle grated cheese over the salsa and cook in 180C oven for about 15-20mins, until the cheese is melted and browned a little.  Serve on its own or with a green salad, or rice.

If you want to use chicken I would suggest the following amounts:

BBQ Chicken - the whole thing
Breasts - at least 500g if you shred it well, otherwise up 800g would get you a decent amount of chicken
Roasting chicken  - the whole thing

You can also use lower grade chicken drumsticks and slow cook them for the meat - this is cost effect but I would highly recommend you trim some of the skin and this can be time consuming. Alternatively most chicken shops will sell drumstick fillets that have had the skin and bones removed for you and is slightly cheaper than breast chicken but slightly dearer than the drumsticks, I recommend slow cooking this meat as its much nicer.

I use "Mission" brand burrito bread because I think they are good quality and you tend to get a decent amount for the price you pay. I have also used Home Brand burrito bread from Woolworths, because again you get a decent amount for the price you pay which is usually around 12-15 pieces - much better than the other brands. Burrito bread has a good shelf life. However, if this doesn't suit you to use burrito bread, you can always use Lebanese bread or make your own burritos.


Tuesday, January 22, 2013

Pancake Cupcakes....is it possible?? My copy of Profitjes

I grew up going to second hand markets and garage sales. Every second Saturday of the month I was woken up by my mother at 6am to get ready and head off to North Sydney Markets. Every 4th Saturday ( I think?) was the same ritual for Kirribilli Markets. I loved how each time we went, we came home with curious and thrifty treasures. It was an experience I richly enjoyed. I think my love of ethnic food was born from attending markets. As we would leave so early in the morning we would normally have a mid-morning brunch to fuel our rumbling bellies so we could continue our treasure hunt. As a child I enjoyed the cake stall run by the preschool parents at the North Sydney Markets.I would have 50c to spend on a sweet treat of my choice, which was usually devoured after my savoury brunch which could either be; Korean dumplings, a sausage +bacon+egg roll, or Malaysian noodles. Thinking back on  North Sydney Markets, I don't think there was as much to choose from as there was at Kirribilli.  At Kirribilli, there was the same sausage+bacon+egg rolls, but you could also have these amazing satay skewers with salad on a pita roll, or with rice which were so scrumptious. I also liked a particular Asian food stall which were run by a husband and wife team. Their specialties (at least to me) were their homemade (for a while anyway) spring rolls and dim sims. As for a sweet treat, well this is the true reason why I am writing this post. Have you heard do Profitjes? I was introduced to these amazingly irresistible pancake-like treats at Kirribilli Markets about 20 odd years ago!! It was the mere thought of this stall that helped me get out of bed on freezing cold mornings to go to the markets. Sometimes I didn't care if there was bargains to be had, I just wanted some steaming hot Profitjes with maple syrup, or chocolate or caramel fudge sauce, coupled with banana or strawberries and married with real whipped cream and a sprinkling of powdered sugar. It was so delicious and I am literally drooling as we speak. Oops! Please excuse me a moment, while I wipe up my dribble.

So with this memory in mind and sometimes haunting me from time to time, I came up with the idea of possibly making pancakes in a cupcake pan to try desperately to recreate my child-teen-young adulthood memories of the infamous Profitjes - dutch pancakes.  So I made my own pancake recipe, which I am sure we all have our own favourite one. I whizzed up the ingredients in under a minute in my HotMix Pro Gastro. Using well greased cupcake pan, I pour a large soup spoonful of the mixture into each cupcake pan and placed them into a pre-heated oven of 180C.  This is what I got.


Super delicious with ice cream and maple syrup. These are also a good idea if you need to feed a lot of people at once and don't want to be flipping pancakes half the morning or night!  You could easily add fillings to the batter before they go in the oven too.


Monday, December 10, 2012

Christmas Cooking....Sweet and Salty Rocky Road Crunch

One thing I so love about Christmas is the opportunity to cook for others not just on Christmas day, but also to whip together little treats and give them as gifts. Each year I search for and make something new. I haven't quite found something that really has taken my liking so much that I can't stand it, but I did begin my whipping up of delights on Sunday. We were heading off to have a picnic up on the central coast with friends and I made some rocky road Christmas trees. Rocky Road is one of those things that could be likened to how different a curry is depending on which parts of India you are from. Rocky Road means different things to different people so there are many different recipes floating around the internet. Traditionally, I am told, Rocky Road was made with nuts, coconut, glazed cherries, and marshmallows. Personally I am not a fan of glazed cherries and I don't like how coconut stays in your teeth/molars for hours after you have consumed the chocolately goodness. So I don't add  that either. In replacement of the cherries I add raspberry lollies. I don't really replace the coconut per say. I tend to add whatever takes my fancy at the time. However, what my recipe always maintains is good quality Cadbury chocolate, nuts, and marshmallows. Those who consume my Rocky Road tell me its to die for, which I think is one of the best compliments a cook could ask for!

Today, I made something kinda like Rocky Road, but very different in more ways than one. It didn't have anything resembling a cherry or raspberry lolly. It does maintain the chocolate part and the marshmallow, but I decided to add a little crunch using Heath English Toffee Bits.

First of all, I do have to apologise to all my Aussie readers. To my knowledge, I don't believe you can purchase Heath English Toffee Bits here in Australia. I was lucky to have a family member bring some back from the USA for me. What you could substitute it for could be homemade toffee processed into small bits. You could also use the caramel chip/bits that Nestle make, or you could chop up some caramel fudge or Jersey caramels, but you won't get a crunch effect, but it would still taste really good! I also added broken up pretzels to the mix and this is what I got.
This is a mixture of sweet and salty, smooth and crunchy. It makes for a different take on the traditional Rocky Road, that's for sure. I'm confident my recipients will be delight.

Sunday, December 2, 2012

Waiter my Ranch Dressing is green! Wasabi or Jalapeno?


Well. if you are up for a spicy but not on-fire salad dressing or dip, then this is the one for you. Personally, I'm a very big fan of jalapenos, well the pickled variety and almost anything  that is jalapeno flavoured. I like the bite that doesn't burn like red chili can. I'm also a fan of wasabi and I also love wasabi peas. While both wasabi and jalapeƱo sauce are both green in appearance there is no way you could confuse their flavours. Wasabi is actually not a chili and is not an oil based food, like jalapenos and other chilies. So while wasabi gives a bite that can burn your nasal passage and clear your sinus, it does not last and linger like the jalapeno can.
The reason why I bring these two foods up, is that a friend, who shares the love of wasabi and in particular wasabi peas, told me about a restaurant in America that did wasabi ranch dressing. Whoa! Hold up! I would never have thought to do such a thing, but brilliance is all I can say. How awesome would that be, one of my favourite pastes married with one of my favourite dressings? Anyway since then I have not managed a trip to America to experience this perfect union of hot paste and dressing in person,  but I have been meaning to re-create this at home.

This evening, I felt like attempting this, but as I didn't have wasabi paste on hand I decided to try the Tabasco jalapeno sauce instead, and people, this is awesome stuff ! What a combination, and yes it turns your ranch an interesting shade of green! I used it for a dipping sauce for chicken nuggets, but this could be used for a your favourite salad, raw vegetable platter, chips or crackers, chicken wraps, steak, and so on! You must try!

Jalapeno Ranch Dressing
1 Cup ranch dressing
2-4 drops (or more if as desired) of Tabasco (or similar brand) Jalapeno sauce

Mix the two together, refridgerate for at least 20 mins and stir before your serve.

* if you are after a thicker dip, you can add 1/4 cup sour cream and 1/4 cup mayo to the ranch, but keep in fridge for at least 1 hour or more before serving.

Sorry about the photo, I had to use my Ipad and it was at night, so not the best, but you should be able to see the tint of green.


Tuesday, October 23, 2012

Mamma's Nachos in the HotMix Pro


If there is something I could say that I love about my HotMix Pro, that would be that I can add vegetables to a dish and my kids are none the wiser!! I have already posted about adding veges to my bolognese, but I felt I didn't have to limit myself to one dish of disguise. My kids love nachos and generally when we have them, its just a quick 'back-up' meal and I just melt cheese on corn chips and add salsa. Now and then I do the real deal with mince with lettuce and fresh tomato. I have before added a taco seasoning mix, but I haven't done this for ages because it usually leaves me with a stomach ache, flavour enhancer 621 is not a friend of mine! I moved onto to adding cumin, paprika, and a dash of chilli, which the kids would um and ah over. Sometimes I just added salsa from the jar to the mince, and this was acceptable to them. So with this last success in mind, I went about recreating the same thing with fresher ingredients, well up until the tomato puree, but mainly fresh ingredients and I came up with Mamma's nachos! So this is what I did.

Ingredients

 1 large carrot cut into 2-3 three pieces

One whole capsicum, I used red as that is what I had. Cut into a couple of pieces.

Half a medium sized onion chopped into 2-3 pieces

2 roma tomatoes cut in half.

450g lean beef mince

1 tin tomato puree

2 tablespoons tomato paste

Salt and pepper to taste


Method

You can adapt this to cooking in your own frying pan, but I made this in my HMP.

1. Chop onion on speed 4, for about 15 secs.
2. Cook on 51C, on speed 1 for about two minutes in a drizzle of oil, or I used a teaspoon of coconut oil.
3. Add other vegetables and chop on speed 4 for 20secs, press stop and scrape down sides.  Then cook together at 51C for about 3 mins on speed 1.

4. Add mince and cook on speed 1, at temp 90C for 20 mins.

5. Drain some of the juices out with a spoon, then add can of tomato puree, tomato paste and season with salt and pepper and mix on speed 2, for 1 minute.

Enjoy with corn chips, sour cream, lettuce, salsa or however you want to enjoy it!! Personally, I love spice and I add jalapenos or a few splashes of green Tabasco sauce. Mamma knows that spices, herbs, and flavour enhancer is not good, so this is a great alternative, if I do say so my self, and well I'm mamma so I can!!   Its also got the veges and most importantly, you don't have to stand over the frying pan cooking it!!

You can add all sorts of veges to this recipe, but I would not go too over board with how many you add, or your cover will be blown!!


Thursday, August 9, 2012

Mastering Caramel in the HotMix Pro

One of the main differences between a HMP and TM 31, Kenwood Cooking Chef, a ThermoChef, and other thermal cooking machines, is that the HMP can reach 130C for the Easy model and 190C for the Gastro model. The others just can't do this. Its as simple as that.  I know some comments have been made that the TM 31 can make nougat for example, but the whole recipe from start to end, can't be made in the TM 31, you have to transfer ingredients to a saucepan. With an HMP from beginning to end its in the one machine. If you have ever made caramel on the stove top then you will know what it takes. It's not a simple task and there is more than 1 piece of cooking equipment required. With the HMP, all you need is the machine and the paddle attachment, it is that simple and once the ingredients are in, you simply walk away! It's just so good, its hard to believe. Well, you have to believe it people, because I have done it!  I have to admit, it took two attempts to get this recipe right. With my first attempt I used honey as my sweetener and my critics family were not impressed with the honey flavour, they wanted the real stuff!! That being said, if you like honey I recommend you try making caramel with honey its a healthier option than the one I went with.

So this evening, I took on my challenge of making better caramel that would make my critics family happy. I used this recipe,  at AmberLee's blog, giverslog. The only thing I replaced was glucose syrup for the light corn syrup and as this is a really hard substance I didn't really measure exactly 1 cup, it could have been a little less. If the glucose syrup has been sitting in your cupboard for a while and its winter (as it is for me) you will need to sit it in some very hot or boiled water to make it runny. I find measuring it and then pouring the measured amount a waste of time, so I just estimate it as I pour it from the container. Its up to you how you want to do it, but if you do measure it sit the measuring cup in the same water for a little bit before adding to the HMP so it comes out easily.  I also used 300g of butter.

This is what I did.

Add chopped butter to HMP and set on speed 1 and temp to 130C and allow the butter to melt, which should only take a minute or so, but the machine won't reach 130C.

When butter is melted, press stop and lift whole lid to add the sweetened condensed milk, brown sugar and glucose syrup, and attach paddle. Close lid and allow to continue to cook on speed 1 until it reaches 130C, this can take 15-20 minutes, but it doesn't matter too much what the time is the HMP will stop when it reaches 130C. Make sure the lid stopper is in place during the whole process. Once it reaches 130C and beeps, add the vanilla extract and let cook for a further 1 minute. The caramel will look like this:
Actually, I overcooked this just a little, so yours might be a little lighter perhaps or at least not as thick as mine ended up. I cooked it until 134C, but I think stopping at 130C is the best temp, as this is what I did on my previous attempt.

Pour this onto a baking tray that has been lined with baking paper and allow to cool before you pre-cut or put into fridge. Or, you can mix things up a little and do what I did. I know its very fashionable to add salt to your caramel. Personally, I have never consider this an attractive option, but today, I thought I would take the idea on but in my own way.
While the caramel was cooking I broke up some pretzels with my hands and scattered them over the bottom of the lined baking tray. I also broke up some milk chocolate Cadbury melts, and I also had some Nestle Caramel chips so I spread some of those in as well. I poured the caramel on top of this layer and while the caramel was still hot I scattered more milk choc melts on top. The heat of the caramel melts the chocolate.
After about 1/2-1 hour, the chocolate is nicely melted and you can start to cut the caramel up into small pieces, but still be careful as it is still quite hot, particularly in the middle. Allow the caramel to continue to cool completely preferably outside of the fridge. Store in an airtight container in your cupboard or fridge.
My critics family have praised me on this latest effort and because I have my HMP doing all the hard work for me, I know I can only get better from here.  I also can't wait to use this recipe for caramel apples. Rest assured, as soon as I do this, a post will soon follow, because come Halloween and Christmas, I will be doing this in a big way! I haven't been able to master the art, but now I know I can make it work!

**This does make a slightly harder caramel. A change of temp for example, 125C or so could create a slightly softer caramel. A few more attempts and I am sure I have it down pat!!**

All the indgredients used in this recipe can be stored easily in your pantry, making it a perfect food storage recipe. The butter can be fresh and stored in your fridge or you can also use canned butter.


Sunday, June 10, 2012

Almost Vege Burgers - Bacon Added!!

I call these almost vege burgers because, while the majority of the ingredients are vegetables, there is a small amount of bacon in them. I had to add the bacon, so that my kids would give them a go. Unfortunately, not all my kids thought that was enough:(. One of my sons felt there was far to much green in them, so would not go anywhere near them. My daughter and my youngest son ate them and gave them a thumbs up, my other son, felt there was not enough meat in them, so again wouldn't go near them! Well, you win some, you lose some! Personally, I love them and my HMP came in handy to make them in a short period of time.

1 Carrot chopped in three
1 Capsicum roughly chopped
1/2 large red onion roughly chopped
1 broccoli
1 handful of baby spinach
5 mushrooms
1/2 tablespoon of chopped/minced garlic
5 pieces short cut bacon chopped, cooked and cooled
1 egg
1 cup flour
1/2 cup bread crumbs
Salt and pepper to taste


1. In HMP add above vegetables and chop on speed 6 for 10 secs.
2. Add egg, flour, crumbs, bacon, and salt and pepper to taste. Speed 1 for 15-20 secs. Make sure you check consistency, you may need to add a little more flour should the mixture not keep together.  Add to a clean bowl.

3. Roll mixture into palm size balls (or bigger if you like) pat out into patties and refrigerate for at least 15 minutes.
4. Heat frying pan to med/high or Teppenyaki pan if you have one. Spray with oil and cook until brown, turn and cook other side until brown.Repeat with remaining burgers.

Serve with salad or on burger buns. These are really good the next on a sandwich or even on their own. For the chilli fans, you could add a fresh red or green chilli in step one or dried chilli to taste in step one.


Friday, May 4, 2012

HotMix Pro Recipes: Kingston Truffles, perfect for Mother's Day

One of my most favouritist and easiest sweets I like to make that is always a crowd pleaser is Oreo truffles. Everyone loves them and I so wish that I invented them, but alas its a borrowed idea and basically I make them over and over using my favourite cream biscuits, because naturally I unfortunately have many of them!


I particularly enjoy the Arnott's Kingston. This chocolate cream is sandwiched with what can only be described as mini butternut biscuits. Many of us know that butternuts are perfect for a no bake base for cheesecakes and other slices. So why not use them for a truffle?

What you will need:

2 packets Kingstons
125g Philly cream cheese
200g quality chocolate ( I used Cadbury melts)

Method

1. Put Kingstons in HMP with blades on speed 8 for 20 secs.
2. Add cream cheese and mix with blades on speed 5 for 20 secs. Scrape sides and mix a further 15-20 secs or until mixture is smooth and creamy.
3. Leave mixture in bowl if you want and refrigerate for 20 minutes or freezer for about 10mins.
4. Using a spoon roll mixture in balls and put into either mini muffin trays or on baking tray. Put back into fridge or freezer while you melt chocolate.

5. I use mini muffin trays as I find these easy to keep the truffle where I want it and its easy to cover them with chocolate. I use a spoon to drop chocolate over the biscuit balls. Otherwise you can use a skewer and dip balls in chocolate. Refrigerate until set.

Store truffles in a container with a lid in refrigerator for up to 7 days or freeze.

These are easy to make and would make a perfect treat for your mum! Best of all, you can make these truffles with any kind of biscuit, but cream biscuits are best:) Enjoy!

Wednesday, January 11, 2012

The best and easiest Cupcakes Ever!!

Wow, its has been a while since I have posted a recipe. I have dozens in my files that need to be posted, so I thought I would start with a really good one! A week before Christmas we met up with some great friends for a Christmas picnic. It was a blast, and we share some great food. One of my friends made some simple cupcakes that were just divine. I asked her what her secret was and she told me cream!! Just a few basic ingredients and then cream! She didn't have the recipe on her (not too many of us carry around our favourite recipes in our handbag!) So when I had some time, I googled for a recipe and I was directed to a cute blog by the name of Chocolatesuze. Susan Tye is the author and she has a delicious recipe for cupcakes here. I doubled the recipe and used one cup of thickened cream and then another of dollop cream, the batter was so fluffy and smooth I couldn't help but lick my fingers more than once! There is no need for vanilla in this recipe.


 I didn't do the curd nor did I ad any frosting, I didn't feel the need to. That being said, any kind of frosting would work well with this cupcake. I would also say that its a great base for adding flavours and colours to jazz them up whenever you need to. They freeze well too. These cupcakes and not only easy to make, are light and fluffy, and taste so damn fine, that you will have to stop yourself from eating the whole lot!

In future, I when I make these puppie again, I will be cutting the top off a little and filling them with some frosting! Or cutting them in half and making a cupcake sandwich!

Wednesday, August 31, 2011

Costco Recipe Files: Cookie Bakes with Ice-cream

Otis Spunkmeyer chocolate chip cookies are, to my knowledge, only available here in Australia, at Costco. If you know otherwise, please let me know.Anyway, I had not heard of them being here in Australia until I saw them at Costco. The box is in the frozen dessert section and you got a box of 72 portions, which is 72 cookies for around $16.56 which is about 23cents/cookie. The cookies are delicious and I created a new dessert which I think you will like. This dessert can easily be created with Aunty May's cookie dough logs but you would have to experiement with how much to use. Also, if you make your own cookie dough, again, no reason why you can't use your own. I would suggest freezing portions to make it easier to bake in the cupcake pan/tray.

Cookie Bakes with Ice-cream

12 capacity cupcake/muffin tray - spray with oil spray or lightly butter each cupcake hole.
12 portions of Otis Spunkmeyer cookie dough
1 scoop of vanilla ice-cream per cookie bake.

1.Oven to 180C
2. Place cookie portion in each greased cupcake part.
3. Cook for about 10-15mins, or until very lightly browned on top - if you like a chewier cookie, don't let it brown much at all. Allow to cool for 10mins. The cookie bakes will dip in the middle, but this is what you want it to do.
4. Take out the cookie bake from tray and add scoop of vanilla ice-cream - or ice cream of choice and serve immediately.


Bon Appetit!


Costco Recipe Files: Roasted Tomatoes with Bacon and Pasta

I know a promised a Part 3 to my Costco review, but so much time has passed since I said I would, and since I have had a really topsy turvy past month, I am going to leave it there. Instead, I thought I would share with you some recipes I have created with the ingredients I have purchased from Costco since it has opened. I have no affliation with Costco, or any of the brands they sell, this is something I have done on my own. I will add recipes as I make them, so that it helps with your choice making when you are next there. I also think that some of the quanities that are available are a bit overwhelming and leave you thinking, what on earth am I going to do with that much? I am more than happy to share my best foodie knowledge and tips, maybe you might end up like me!!! Hahaha!!! I wouldn't wish that on you!!!

Roasted Tomatoes with Bacon and Pasta

When I saw that Costco were selling grape, cherry, and mini trussot and roma, tomatoes by the kilo, I was in heaven!! I really don't know why, but these items are so expensive at Coles and Woolworths. By the kilo most of these are at least $15-$24/kg. A couple of years ago I was buying mini roma tomatoes by the kilo at sydney's Femington Fruit Markets for $2/kg, so why were they being so grossly overcharged? Well, I suppose we don't have to be a genius to know the answer to that one!! Anyway, I had trouble purchasing mini tomoatoes of any kind over the past few years unless they were on special. Naturally, when I discovered Costco's prices ranged from $6-$10/kg I was over the moon. Why? Not only do my kids love these, and not only do are they good in salads, but they are also amazingly versatile in heaps of different recipes. When I got my mini romas for $2/kg I made amazing pasta sauces and they were also mouth wateringly delicious roasted with garlic and herbs and tossed through pasta. The later dish is what I did a lot because its not only healthy, but super cheap!!!
Here is what I did with my grape tomatoes from Costco.

Ingredients

500g grape tomatoes
350g bacon
Olive oil
2 tbsp minced garlic
salt and pepper to taste.
1-2 tbsp dried mixed herbs - or herbs of choice
Pasta of choice - cook according to packet directs.

Method
1. Oven at 180C, line baking dish with foil.
2. Cut tops of each tomato and squeeze out juice and seeds and add to baking dish. This is can take some time. Its up to you, you can just as easily cut them length wise and add them straight to baking dish.


3.Add oil and garlic together in a small bowl and mix well.Add herbs and stir through.
4.Pour oil mixture over tomatoes and toss to coat. Sprinkle salt and pepper to liking.

** Be careful with salt, if your mixed herbs or herb seasoning already has salt, you may not need to add anymore**
5. Bake in oven for up to 20mins or until kicthen smells delicious and tomatoes are black around edges.

5. While tomatoes are baking, chop bacon and cook in frying pan on medium/high heat until brown and crispy. Drain excess oil off bacon by putting on paper towel.

** I also added some zuccini by peeling it with one of these:
Add zuccini just towards end of bacon crisping up.

6. Add tomatoes and all juices and bacon into cooked pasta and gently stir through.

**Optional: add some dried chilli before serving***
Bon Appetit!!

Saturday, July 30, 2011

Pina Colada Mountains

I had a hard time working out what kind of name I should give this recipe, but I decided on the above name, purely because of how the dessert looked. If you can think of a better name, I would love to hear it!
I thought of this recipe because my kids love an ice block called SMOOZE, have you heard of it? Its fairly popular here in Australia, although I wouldn't say everyone household has them in their freezers. Basically its an ice block that looks like a mini sunny boy and is primarily made of coconut milk. No artificial flavourts, colours or preservatives. They are a good snack to have. Anyway, my kiddies were asking for them and I didn't have any on hand, so I figured I would make some of my own. So I went to my trusty food storage pantry and got me some coconut cream and canned pineapple and this is what I did.

Ingredients
1 tin of coconut cream - full or light its up to you
1 tin of pineapple - can be rings, chunks or crushed in natural juice

Method

Pour tin of cream into ice cube trays and freeze
Pour pineapple into a zip lock bag with some of juice and freeze.
Put rest of juic in fridge.

Once items in freezer are frozen take out and allow to thaw for about 10-15mins.
Add to blender or food processor with rest of juice and blend until smooth. Scoop out into bowls and enjoy! ( you can also add a scoop or two of ice-cream)

Best thing about this dessert is you can add any kind of fresh or canned fruit that marrys well with coconut. If you don't want to wait for items to freeze you can easily add ice to your blender so you can a better texture, but I think it works better for the items to be frozen.
Pantry items
Tin coconut cream
Tin pineapple

Tuesday, June 21, 2011

Dodged Another McDonalds bullet tonight with this....

So I was seriously thinking an easy meal was install for tonight. I had work today, went to gym and had to get kids off to Achievement Night at 6:45pm, so something had to give. I really didn't want to get McDonalds, if I did it would just be for the kids anyway. I think I have grown out of McDonalds, I felt sick the last couple of times I have eaten it, so I try to steer clear of it, which is a food thing of course. Anyway, I had made the decision and as I was finishing at the gym, I felt like Mexican. I love Mexican!! The first thought was to make nachos but by the time I got home I realised I had my trusty food storage ingredients and could whip up something even better, quesadillas!

I used a breast of chicken in the fridge,a tin of corn, a tin of red kidney beans, salsa, and burrito bread. I have to say here, that burrito bread is very versatile and can live in your pantry for up to 12months and still taste good. I purchased mine about 3months ago on special, so it was now coming in handy!

What do you do?

1. Diced the chicken into small pieces. Heated a frying pan over medium heat and added some oil.

2. To the oil I added a ground cumin and ground paprika and stirred that through the oil for about a minute then added the chicken.

3. Rinse the kidney beans and corn in a colander or sieve under cold running water until bubble disappear and water runs clear.

4. As the chicken is cooking, if some pieces can be broken down further, do so.

5. Add the kidney beans and corn and stir through and lower heat.


6. Take off heat and allow to cool slightly.

7. Put burrito bread in microwave as per instructions on packet or oven, whichever you prefer.

8. Using a foccacia or flat sandwich press, place one piece of bread down and top with chicken mixture.


Add grated cheese if you like and put another piece of burrito bread on top and lower sandwich/foccacia  press.

9. Cook until golden brown and cheese melted.

10. Serve with sour cream, salsa or my mexican aioli dip.

The story behind the Aioli.

I made some homemade Aioli on Sunday as I had some left over egg yolks. It is the first time I have ever done it and I was so proud of my creation, its tastes do yum!  For this meal, I didn't feel like sour cream but I did want to have something with the Quesadilla. I saw the aioli in the fridge and wanted to use it some how. By itself, it wasn't too bad, but it needed to be Mexicanised!!

When I was last in Melbourne, I finally went to a grocery store my sister-in-law had been telling me about for a while. Leo's Fine Food and Wine store in Kew. Its like a regular supermarket, but with a twist! It has an array of foods one would only find at range of delicatessens or speciality food stores. Its a amazing, to me, better than Costco - Woh! That's saying something!!! Amongst other amazing items, I came across a brand I have not seen much at mainstream supermarkets for a while, and I have missed. Byron Bay Chilli Co. I purchased a bottle of the green jalapeno sauce with coriander.


It sounded delish and too good to refuse. As we were flying home, I was limited to how much I could take home with me, so this made the cut and we also bought some exquisite nougat that was so smooth, not chewy or crunchy, just right. Unfortunately after about 10 minutes of leaving the store the nougat was devoured!! It was that good!!

 Back to the the recipe. I just added the Green Jalapeno sauce to the aioli and I made an amazing dipping sauce that was just what the quesadilla needed. I am a genius!!!


Pantry Ingredients

Kidney beans
Corn
Burrito bread
Salsa
ground cumin
ground paprika
Byron Bay Chilli sauce (optional!!)
Related Posts Plugin for WordPress, Blogger...