I have to admit, I have been out of the loop so to speak about all of this drama over the brand new Thermomix model that has recently hit the party plan circle. It has taken a day of lying in bed sick to catch up on all the drama. Yes, I have to say drama and I do apologise for the overuse of this word, the teacher in me is going crazy, because with Thermomix there is never anything but drama. You are either being abused for saying anything against their blessed Thermi or criticised for saying anything else is comparably better....believe me I know! Now they have presented Australia with the new model TM5 but they have gone about it all the wrong way - wow no surprises for me!! Now I had heard rumours since I started blogging about my HotMix Pro (HMP), that a new model was going to be released within a year that would be better than the HMP - and I thought they weren't bothered by competition! I do hope all the people who have been mislead about the release of the new model are being looked after. I don't see how something like this can be considered good business ethics, regardless of whether it is legal or not.
From what I can tell, all the new functions of the TM5 are interestingly similar to what the HMP Gastro has and yes, I do find this rather ironic. All the back lash and comments I have received over the years from blinded lemming followers of the Thermomix Cult attacked me about how the TMX 31 was set to the best healthy cooking temperature. Anything higher would destroy the food molecules and I would be feeding my kids dead food - yes again, rather ironic! How then, are you going to explain why Vorwerk decided that the TM5 needed an increased temp range to 120C? Is there new scientific proof that 10C more is now better for our food molecules? Now, don't get me wrong, I don't think everyone thinks like this, but this is for the people who don't think for themselves and believe everything they hear. Other than the cookbook chip, the slightly higher temp, and the slightly faster motor - which again the HMP was criticised for and now they are competing with - again, the irony over floweth! There is also a larger Varoma, but can we really tell how much larger it is? At the end of the day, if I was going to consider this new machine the only thing that would make me think for 10 seconds longer would be a larger bowl. This is the one thing that most woman want, and yet they still can't deliver. Who cares about a new design measuring cup and butterfly - whoopy whoo! However, the biggest thing on most people's lips is, "tell them the price son"! They currently have an introductory price of $1939, but what will it be when this is over? Who knows? I wish I did because if its the same price as the HMP I will laugh until I pass out.
At the end of the day, the TM5 is an attractive machine and the cookbook chip is clever. But is it still the absolute best machine on the market that is deserving of what I can only guess will be a price tag above $2000? I recommend you take a look at my previous posts of the HMP. See what is on offer, compare the two and see what the HMP offers for their price tag and compare to what the TM 5 is offering. Personally, and yes of course there is bias in this, as there is bias in every Thermomix owner's mind too, I highly recommend you try the HMP Gastro. The HMP Easy comes at a lower price tag, but for a little more, the Gastro offers a faster motor and higher temp range. I use my HMP Gastro almost every day. It does all the things a TM 5 or TM 31 can do, though it doesn't come with a Varoma, but a steaming function can still be achieved. Do the homework people, don't always settle for what you know or what your friends have. Thermomixers are a lot like Dyson vacuums. Its the in thing to purchase, and you aren't a good vacuumer unless you are using the "Dyson" - give me a brake! Thermomix shermomix and Dyson shmyson! Buy what you like and what works for you, even if you don't purchase an HMP, please oh please do the research on all the available thermal cooking machines that are currently on the market. Buy what suits your circumstances and especially your budget.
Okay Thermomix lovers bring it on, I'm ready!!
** apparently the bowl is a little larger, 2.2L to be precise - not a deal breaker for me personally and the introductory price is $1989 not the above mentioned price of $1939 - sorry to get you excited over saving $50. ;-p*****
Showing posts with label HotMix Pro. Show all posts
Showing posts with label HotMix Pro. Show all posts
Sunday, September 14, 2014


Thursday, August 21, 2014
Almond Butter in the HotMix Pro
My mother is Canadian and I swear I have more Canadian in me than Australian sometimes, well at least in my taste buds! I love peanut butter and maple syrup in and on almost anything!! I love bacon, but not any kind of bacon. I prefer Aussie to American and interestingly enough Canadian bacon is better than American - in my humble opinion, but I'm still happy to crunch on American bacon when its on offer. I could go on about how much the North American cuisine attracts me more than my homeland sometimes, but I need to stay on track. My fav website, Pinterest has tempted me once again to make the overly popular almond butter and since I love peanut butter so much, I had to give it a go. Since I have my HotMix Pro handy, I knew this would be a breeze to make. This was my first attempt and I am happy with my results.
Almond Butter
400g roasted almonds - I took raw almonds and dry roasted them in my oven
In HMP on speed 9 for 1-1.5mins. Scraping down the sides helps at intervals with blades off. I found that the consistency was not coming together so the only oil I had on hand was sunflower oil. I splashed a small amount in and the butter came together quite nicely. I also added a small amount of brown sugar - about a table spoon.

Maybe next time, I'll use raw almonds and see what kind of flavour I prefer and maybe add some other nuts too.

Almond Butter
400g roasted almonds - I took raw almonds and dry roasted them in my oven
In HMP on speed 9 for 1-1.5mins. Scraping down the sides helps at intervals with blades off. I found that the consistency was not coming together so the only oil I had on hand was sunflower oil. I splashed a small amount in and the butter came together quite nicely. I also added a small amount of brown sugar - about a table spoon.
Maybe next time, I'll use raw almonds and see what kind of flavour I prefer and maybe add some other nuts too.
Thursday, September 19, 2013
Thermomix TM 31 versus HotMix Pro Easy / Gastro revisited
Since I have had such an overwhelming response on my previous reviews I have decided to extract some points of each review and reiterate these perhaps more succinctly and also address some common comments.
When I wrote my reviews I had not had extensive personal use of a TMX, this is true, however I have two sister-in-laws who have machines and many, many, many friends who have machines of their own and some who are demonstrators. Before I knew about the existence of the HMP, I would talk non-stop about how awesome the TMX was and how I longed to be able to get one. I think, realistically, that my discussions with many friends and family lead them to purchase their own machine! I went to many demonstrations - in fact most friends knew I would go so I was an easy target! I did hours of research on blogs and youtube videos. I then came across the Vitamix, which was a lot cheaper, but after further investigation realised it didn't cook, as it was not a thermal machine. I didn't feel I could be satisfied with it. That being said, if I was only after a super blender I would consider a Vitamix - it's amazing. The longer I waited and due to my extensive research, I started to see more thermal machines coming on the market, overseas to begin with, then here in Australia. Some comments I have received say that I can't really compare the machines if I haven't extensively used both. Well, I have to say,I don't know of too many people who could afford to purchase both machines just to work out which was the better machine. Kind of like comparing washing machines or other white goods. The only way you can compare is to do research and ask a lot of questions. A lot of what I base my opinions on is what I see and hear. As I mentioned above, I have family and friends who own a Thermomix and interestingly, I get varied opinions. I speak to these people often and ask heaps of questions about functionality etc. I watched my friends and family use their machines and I based a lot of my decisions on these experiences. I still discuss with them their thoughts and we compare dishes and other points of the HMP and TM 31. I think this is as close as I am going to get without having a TM 31 of my own and in saying that, I do believe its a good enough source of information to work from. Many love their machine and interestingly some feel they could have waited a little longer to consider the HMP, which was not available at the time they purchased their TM 31. Some even say they would have preferred the ThermoChef over the TM 31 and the HMP due to the lower price and the fact that the ThermoChef meets their needs as a basic machine rather than a super duper machine! I have friends with the ThermoChef and they love their machine and some have the Bellini thermal machine and they are happy with this too. At the end of the day each machine offers something different to each person. A decision can be made based on price, functionality, health benefits, and versatility. For me I would say for most people an outstanding factor is price, which is why the cheaper thermal machines whether good or bad have a place in the market. I wish I could have a go at all of them to tell you first hand how they all compare to each other. The contact I do have with the Thermomix is more than any person would have in a demonstration and is enough to give me a good understanding on how it works and how it compares to the HMP.
One of the attractive features the HMP for me was it's temperature control and because it could reach a much higher temperature range. Personally, I do like making caramel and fudge. Without the HMP, I didn't cook caramel often because it is a bit of a pain stirring for so long over the stove. You also should have a thermometer or it can be a bit of a guessing game to reach soft ball or hard ball stage and if you leave it for seconds too long, you can ruin the whole thing. Thankfully, for me the ability now to just add my ingredients set it to a temp and walk away, is in fact a deal breaker.
I've received many comments on my reviews telling me that a higher temperate will kill the nutrients in my food. At what point in any of my reviews do I say that you can only cook food in a HMP at high temperatures? If you want to cook at a lower temperature to achieve healthy food structure then you can absolutely do this and you can even prepare healthy raw salads and dishes if you wish to. Please don't be fooled into thinking that the TM 31 is the only machine that prepares meals in the healthiest way. The TM 31 does have the Varoma that comes with your purchase, which the HMP doesn't. However, I have been informed that you can actually attach a Varoma to the HMP, and you can also sit a bamboo steamer on top of the HMP. So like many of you have pointed out to me; the fact you can can cook a couple of dishes at the one time in your TM 31 really is completely amazing and a real time saver and something so unique about your TM 31 actually is in fact a shared feature with the HMP so makes them comparable.
I want to address the temperature control feature of the HMP, which in essence helps you manage how you want to cook and prepare your food. For all the health conscience people out there who have purchased their Thermomix because they were told it is the healthiest way to prepare your food because the thermal machine controls the temperature and leaves important vitamins and minerals of food intact,well then I must inform you, so does the HMP. You in fact can control the temperature of how your food is cooked with 1C increments in comparison to the TM 31 which controls the temperature for you primarily in 10C increments. If you found out that more nutrients could be saved by cooking a dish, for example, 3C or lower than what your controlled temperature thermal machine offers. Would you not be annoyed to know that you could be effecting the nutritional and general quality of your food by a difference of a couple degrees? Personally, I find it comforting to know that I can manage how my food is cooked, instead of the machine. The HMP offers the best control and to my knowledge is the only thermal machine on the market that does. I think this is an outstanding feature.
I hope this review gives you a little more insight on how the machines compare. I still maintain that the machines are very much comparable. If I had a Kitchen Aid mixer or a Kenwood Cooking Chef and I was trying to convince you that either was better than a thermal cooking machine I could understand if you thought I was a bit batty. However, the TM 31 and the HMP are both classified as thermal cooking machines and thus can be compared.
Finally I will take this opportunity to make something very clear, the TM 31 is a good machine and I don't believe I have bagged it out in any way. My reviews are to educate you on my experience with my machine and compare it to the machine that I once thought was the best thing on the planet! I would dare say that many of you reading my reviews have thought the same and maybe very close to making a decision on which to purchase. It is really important to do your research as I did. See what other people have experienced on both blogs, forums, and in person. Work out what each machine offers and whether particular features will benefit you and how you cook. One thing that I will point out that both machines need to work on the capacity of the jugs. If you have the money, the HMP offer twin machines, which is essentially where you have two thermal jugs that can cook at the same time, but it does come with a price tag. Otherwise you will have to purchase extra bowls, which in isn't quite the same as having a bigger bowl in the first place.You can also purchase extra bowls for the TM 31, but again, you can't cook at the same time.

If you are not convinced by me telling you how good the HMP is, then I invite you to take a look at Tenina Holder's website. Tenina is author of the popular independent Thermomix cookbook, "For Food's Sake" and she is very well known in the Thermomix world. She once worked with Thermomix Australia as a recipe developer. She has since gone solo and not only wrote a successful Thermomix cookbook, and has an extensive recipe repertoire on her own website.She also runs cooking classes to help Thermomix users understand their machines better and cook amazing dishes. So you would think, after all these accolades that she would only support the TM 31? Unfortunately, you would be wrong. She actually uses the HMP too and strongly supports its design and functionality. Tenina says, " I am the proud owner of the wonderful HMP or HotmixPRO, the middle model, commonly called the Gastro. I am loving it! Basically a commercial Thermomix, with a few additions, it has been in my kitchen a wee while and you will start to see recipes using it creep on here from here on in. It has a lot of attributes that the Thermomix does not have."
So there you have it, not just little ol' me, but Tenina also agrees that the HMP is a great machine.

Sunday, August 4, 2013
HOTMIX PRO EASY AUSTRALIA WIDE GIVEAWAY!
If you've been coming to my blog and drooling over the amazing recipes here or even if you have visited Tenina's site and embarrassingly wiped the drool and hoped no body noticed, and you've put the HMP Easy on your wish list. Here is the best chance you will have to score your very own HMP Easy. Amanda and the gang (me included) are giving away a HMP Easy. It is super easy to enter and if you invite family and friends to enter, it will increase your chances of winning. Check out my recipes by clicking on the sidebar for HotMix Pro. Tenina Holder, Thermal Mixer Queen and author of "For Food's Sake" has tonnes more mouth watering recipes that can be achieved using the HMP. Giveaway is open to Australian residents only. For full details, click on the "Enter Here" link below to Amanda's, Tout Mon Amour blog. If you wish to know more about what the HMP can do, see my articles or click the HMP info request button to the right.
Good Luck!

ENTER HERE
Good Luck!

ENTER HERE
Tuesday, July 30, 2013
HotMix Pro recipe: Graham Cracker Custard Cream Dessert Slice
I had a hard time trying to work out what to call this dessert. I made it up this morning as I had to bring a dessert/slice to a family gathering. I had planned to make a caramel slice but didn't have a can of condensed milk and couldn't get to the shops last night. So I had to come up with something. Logic told me to use my Otis Sputmeyer cookies and make it simple for myself. But my heart was telling me no, don't take the easy road, do something different. So my heart won, although I am not sure if it was my heart telling me that?
Anyway, I found some look-a-like Graham Crackers at my favourite Asian supermarket, Madam Hoo (Castle Towers, Castle Hill). They are not from America but they taste and look pretty much they same.
 They come in a brown plastic box, which is really good for re-use. I knew I wanted to use the Grahams. If you can't find Grahams, then savoiardi sponge fingers are good sub, or milk and coffee biscuits could work well too. Usually when you think of a slice, lots of butter is involved. I wanted to steer away from butter as best I could. So I decided that the layers of my slice would be the Grahams themselves. I also felt like custard, so the filling had to have this. Naturally chocolate had to be incorporated somewhere. So this is what I came up with.
Ingredients
1/2 tub Pauls thick vanilla custard
1 block cream cheese softened
200ml thickened cream
Teaspoon gelatin (amount of water required to dissolve which is on packet)
2 cups of warm milk
Grahams or biscuits - can't remember how many small packets I used, but if using other biscuits 1-2 packets depending on size of dish.
100ml cream
200g dark chocolate
square or rectangular deep dish
Method
1.Whip cream cheese on speed 4 in HMP for about 40 seconds
2. Add custard, and cream and mix on speed 4 for a further 30 seconds
3. Dissolve gelatine in required amount of hot water (see package for 400ml guide lines)
4. Add gelatine to mixture and mix on speed 2 for 1 min. Set aside.
5. Soak biscuits in warm milk and lay to cover base of dish
6. Pour cream cheese mixture over biscuit layer - not too much

7. Repeat soaking biscuits/crackers for next layer and poor cream chees mixture until you have several layers - as many can fit in dish without over flowing - don't do this.
8. Put in fridge and make ganache.
9. Over medium heat melt dark chocolate and cream until well combined, set aside to cool ( this can be done in HMP as well)
10. Pour half ganache on the top layer of biscuits spread to coat the layer. Soak last lot of biscuits in milk and layer over ganache.
11. Pour remaining ganache over biscuits and put this in the fridge to set.

I had some left over caramel from my caramel apples so I added this to the slice, however, I don't recommend this. Once the caramel sets in the fridge, it is hard to dish up. It looks good, but not so practical. If you made a caramel sauce that is not cooked as long that would be better.

I don't have any final pictures because it was eaten so quickly;) My family gave it the thumbs up. Personally, next time I might add a little more gelatin, so its a little firmer, but most of my family were happy with the consistency. It is a good invention if I do say so myself. I might make a caramel one next time!
PS. If you think of a better name share it in the comments!
Anyway, I found some look-a-like Graham Crackers at my favourite Asian supermarket, Madam Hoo (Castle Towers, Castle Hill). They are not from America but they taste and look pretty much they same.

Ingredients
1/2 tub Pauls thick vanilla custard
1 block cream cheese softened
200ml thickened cream
Teaspoon gelatin (amount of water required to dissolve which is on packet)
2 cups of warm milk
Grahams or biscuits - can't remember how many small packets I used, but if using other biscuits 1-2 packets depending on size of dish.
100ml cream
200g dark chocolate
square or rectangular deep dish
Method
1.Whip cream cheese on speed 4 in HMP for about 40 seconds
2. Add custard, and cream and mix on speed 4 for a further 30 seconds
3. Dissolve gelatine in required amount of hot water (see package for 400ml guide lines)
4. Add gelatine to mixture and mix on speed 2 for 1 min. Set aside.
5. Soak biscuits in warm milk and lay to cover base of dish
6. Pour cream cheese mixture over biscuit layer - not too much

7. Repeat soaking biscuits/crackers for next layer and poor cream chees mixture until you have several layers - as many can fit in dish without over flowing - don't do this.
8. Put in fridge and make ganache.
9. Over medium heat melt dark chocolate and cream until well combined, set aside to cool ( this can be done in HMP as well)
10. Pour half ganache on the top layer of biscuits spread to coat the layer. Soak last lot of biscuits in milk and layer over ganache.
11. Pour remaining ganache over biscuits and put this in the fridge to set.

I had some left over caramel from my caramel apples so I added this to the slice, however, I don't recommend this. Once the caramel sets in the fridge, it is hard to dish up. It looks good, but not so practical. If you made a caramel sauce that is not cooked as long that would be better.

I don't have any final pictures because it was eaten so quickly;) My family gave it the thumbs up. Personally, next time I might add a little more gelatin, so its a little firmer, but most of my family were happy with the consistency. It is a good invention if I do say so myself. I might make a caramel one next time!
PS. If you think of a better name share it in the comments!
HotMix Pro: Coriander / Cilantro Chickpea dip

One might think that this is a hummus, however I do not use tahini in this recipe, so I don't think I can claim it to be:) This is a very easy and quick recipe that makes use of some basic ingredients that most kitchen pantries and fridges will have. If you don't have fresh coriander, dried can definitely be used, but I would suggest you refrigerate for an hour or so before serving.
Coriander / Cilantro Chickpea Dip
1 can of chickpeas washed and drained
1/2 cup mayonaise
1/2 cup sour cream or Greek yoghurt
1/2 lemon squeezed
1 tsp garlic powder - or more to taste
dash of olive oil
handful of fresh coriander
dash of salt and pepper
Method
1.Add all ingredients to jug and mix on speed 4 for about 30 secs. Scrape down sides and whiz on speed 5 for further 20secs.
2.You can add paddle and whip the dip on speed 2 for 20 secs if you wish. Refrigerated until serving time.

Sunday, July 28, 2013
HotMix Pro: Orange Blueberry Juicy
I read a quote on a Pinterest pin that America's Biggest Loser trainer Bob Harper, says that we should be eating an apple and some blueberries/berries every single day! When blueberries are in season here, I do buy up big and my kids thankfully like to eat them from the punnet. When they aren't in season, I do make good use of my frozen stock. Inspired by Bob's advice, I came up with a good way to keep blueberries in the diet.
Orange Blueberry Juicy
Handful of frozen blueberries*
2 oranges skin removed and cut in half
2 lemonades* skin removed and cut in half
1 pear cut into wedges
teaspoon of sugar - or sweetner of choice (pear provides a decent amount of sweetness)
3 cups of ice
1 cup of water
Method
Place all ingredients in HotMix Pro and blend on speed 10 for about 20 secs.
* Add exrta ice if using fresh blueberries.
* Lemonades are a citrus fruit which are cross between lemons and oranges. They come into season at winter time and are super delicious to eat on their own like an orange.
If you don't drink this amount in one go, freeze left overs in ice cube trays and this can be enjoyed as a delicious sorbet. Just blend the cubes in your thermal mixer with some water on speed 8. Use your spatula to make sure you get a good consistency.

Wednesday, May 15, 2013
Pinterest Experiment: Baked Fajitas with Cilantro / Coriander Lime sauce in the HotMix Pro
As you all know I very much enjoy Pinterest. I have many boards and will shamelessly declare that I have thousands of pins which increase daily. Again, I will shamelessly invite you to follow my boards, or even if you just want to browse what I pin, you can do so here. I find a lot of solace and inspiration from Pinterest and often I will experiment with the recipes and ideas and see what I come up with.
Lately, I have been making freezer meals, which I seek inspiration for on Pinterest. I do this because it helps me keep chilled in the evening as I don't have to worry too much about dinner and its super helpful if you are trying to stick to a budget. Recently, I came across the recipe for Baked Chicken Fajitas on Pinterest, but comes from Six Sisters Stuff blog. I super duper love Mexican food which is somewhat hard to find here in Australia in terms of restaurants. I follow a lot of American blogs and recipes boards so Mexican recipes appear frequently on my dinner table. The recipe I used from Six Sisters Stuff is as follows:
Baked Chicken Fajitas Recipe:
(Serves 6)
Ingredients:
1kg boneless, skinless chicken breasts, cut into strips
1 can diced tomatoes
1 can diced green chilies*
1 medium onion, sliced
1 large capsicum, seeded and sliced (I used small sweet capsicums for a variety of colour)
2 Tablespoon vegetable oil
2 teaspoons chili powder
2 teaspoons cumin
1/2 teaspoon garlic powder
1/2 teaspoon dried oregano
1/4 teaspoon salt
12 burrito breads, warmed to serve
Directions:
1. Preheat the oven to 180 C.
2. Grease a baking dish, oil spray works well.
3. Mix together chicken, tomatoes, chilies*, peppers, and onions in the dish.
4. In a small bowl combine the oil and spices. Drizzle the spice mixture over the chicken and toss to coat.
5. Bake uncovered for 20-25 minutes or until chicken is cooked through and the vegetables are tender.
Serve with warmed burrito bread and enjoy!
*Green diced chilies are not as common in the supermarket here in Australia, compared to America. You should still find them in the Mexican food/El Parso isle. Alternatively, you could also buy bottled pickle jalapenos, drain them and dice them. I recently purchased some diced green chilies on the internet at Grocery Run.com.au. They were having a USA themed run with lots of different American food items. When I made the recipe I actually omitted them as I know my kids won't like them.
Freezer Friendly
As a freezer meal I placed the chicken, capsicum, and onion in a zip loc bag. I them mixed up the spices and oil and poured this over the chicken and tossed to coat thoroughly. I zipped up the bag and put it in the freezer.
I allow the chicken to defrost, mix through the marinade and pour it into the greased dish.

I poured the tin tomatoes over the mixture and mix through gently.

Then I put it into the preheated oven for about 20mins.
To serve, I used a piece of burrito bread then fresh chopped lettuce followed by a good serving spoons worth of the chicken fajita mixture. Finally I drizzled the coriander sauce on top. You can also use plain sour cream.

Coriander / Cilantro Lime Sauce
This was done using my HotMix Pro, but a blender can also work well.
Ingredients:
1 large bunch of fresh coriander - mainly leaves but some stems are fine
4-5 large leaves of fresh basil
pinch of salt
zest of half a lime
juice of half a lime
1/2 green jalapeno chilli seeds removed. (You can currently get these at Coles or Woolworths)
2 dessert spoons of sour cream - I used light
Put all ingredients except the sour cream into the HMP on speed 4 for 20 secs.
Scrape down sides and add the sour cream and mix on speed 7 for 20 secs. Taste and see if it needs anything more, I added a little bit of brown sugar to mine to even out the flavours.

This meal was an absolute winner in my house, with every last morsel consumed! I hope it becomes a winner in your house.
Do you Pinterest Experiment?
Wednesday, December 19, 2012
HotMix Pro Recipe: Healthy Chocolate Energy Bites
Can chocolate really be healthy? Of course it can and I am not just saying to eat in moderation! What makes these energy bites with chocolate just amazing is the chocolate goodness of Crio Bru. You can find out all you need to know about what Crio Bru is here.
I came across energy bites first on Pinterest. I made some up and I liked them but found them a little bland. So I made some more with Crio Bru and dates and found that they were much better. The HotMix Pro makes these in a breeze, but of course if you don't have a HMP, you can use a blender, food processor, or if you have a thermal cooking machine, like a TM 31 or Thermo Chef that works well too.

Energy Bites
250g rolled oats
50g coconut flakes
50 g Crio Bru
5 dates - seeds removed and roughly chopped
20g LSA

Add ingredients to HMP bowl and blend on speed 6 for 20 seconds.
Then add:
10g Chia seeds - I used black and white mix
150g peanut butter
Blend again on speed 5, adding runny honey or maple syrup until it clumps together, about 15-20 seconds.

You will know when it is ready you have added enough honey or syrup, when you can make a ball that stays together. Roll mixture into balls until all mixture is used and refrigerate.

I have kept mine in an air tight container for up to a month in the fridge. I eat two or three of these for breakfast when I am in a hurry - which means most mornings!! I also like them when I am feeling pekish and would like to eat something sweet - these are a much better choice and can fill you up. Just make sure you drink plenty of fluids after you eat them.
** I want to add that I pre-blended the Crio Bru in my HMP on speed 10, so that it would be finer than its usually consistency, so keep this in mind if you add it to the mix, that you should pre-blend it, then have it blended down again in the mixture...if that makes sense!!**
Tuesday, October 23, 2012
Mamma's Nachos in the HotMix Pro
If there is something I could say that I love about my HotMix Pro, that would be that I can add vegetables to a dish and my kids are none the wiser!! I have already posted about adding veges to my bolognese, but I felt I didn't have to limit myself to one dish of disguise. My kids love nachos and generally when we have them, its just a quick 'back-up' meal and I just melt cheese on corn chips and add salsa. Now and then I do the real deal with mince with lettuce and fresh tomato. I have before added a taco seasoning mix, but I haven't done this for ages because it usually leaves me with a stomach ache, flavour enhancer 621 is not a friend of mine! I moved onto to adding cumin, paprika, and a dash of chilli, which the kids would um and ah over. Sometimes I just added salsa from the jar to the mince, and this was acceptable to them. So with this last success in mind, I went about recreating the same thing with fresher ingredients, well up until the tomato puree, but mainly fresh ingredients and I came up with Mamma's nachos! So this is what I did.
Ingredients
1 large carrot cut into 2-3 three pieces
One whole capsicum, I used red as that is what I had. Cut into a couple of pieces.
Half a medium sized onion chopped into 2-3 pieces
2 roma tomatoes cut in half.
450g lean beef mince
1 tin tomato puree
2 tablespoons tomato paste
Salt and pepper to taste

Method
You can adapt this to cooking in your own frying pan, but I made this in my HMP.
1. Chop onion on speed 4, for about 15 secs.
2. Cook on 51C, on speed 1 for about two minutes in a drizzle of oil, or I used a teaspoon of coconut oil.
3. Add other vegetables and chop on speed 4 for 20secs, press stop and scrape down sides. Then cook together at 51C for about 3 mins on speed 1.
4. Add mince and cook on speed 1, at temp 90C for 20 mins.
5. Drain some of the juices out with a spoon, then add can of tomato puree, tomato paste and season with salt and pepper and mix on speed 2, for 1 minute.
Enjoy with corn chips, sour cream, lettuce, salsa or however you want to enjoy it!! Personally, I love spice and I add jalapenos or a few splashes of green Tabasco sauce. Mamma knows that spices, herbs, and flavour enhancer is not good, so this is a great alternative, if I do say so my self, and well I'm mamma so I can!! Its also got the veges and most importantly, you don't have to stand over the frying pan cooking it!!
You can add all sorts of veges to this recipe, but I would not go too over board with how many you add, or your cover will be blown!!

Thursday, August 9, 2012
Mastering Caramel in the HotMix Pro
One of the main differences between a HMP and TM 31, Kenwood Cooking Chef, a ThermoChef, and other thermal cooking machines, is that the HMP can reach 130C for the Easy model and 190C for the Gastro model. The others just can't do this. Its as simple as that. I know some comments have been made that the TM 31 can make nougat for example, but the whole recipe from start to end, can't be made in the TM 31, you have to transfer ingredients to a saucepan. With an HMP from beginning to end its in the one machine. If you have ever made caramel on the stove top then you will know what it takes. It's not a simple task and there is more than 1 piece of cooking equipment required. With the HMP, all you need is the machine and the paddle attachment, it is that simple and once the ingredients are in, you simply walk away! It's just so good, its hard to believe. Well, you have to believe it people, because I have done it! I have to admit, it took two attempts to get this recipe right. With my first attempt I used honey as my sweetener and my critics family were not impressed with the honey flavour, they wanted the real stuff!! That being said, if you like honey I recommend you try making caramel with honey its a healthier option than the one I went with.
So this evening, I took on my challenge of making better caramel that would make mycritics family happy. I used this recipe, at AmberLee's blog, giverslog. The only thing I replaced was glucose syrup for the light corn syrup and as this is a really hard substance I didn't really measure exactly 1 cup, it could have been a little less. If the glucose syrup has been sitting in your cupboard for a while and its winter (as it is for me) you will need to sit it in some very hot or boiled water to make it runny. I find measuring it and then pouring the measured amount a waste of time, so I just estimate it as I pour it from the container. Its up to you how you want to do it, but if you do measure it sit the measuring cup in the same water for a little bit before adding to the HMP so it comes out easily. I also used 300g of butter.
This is what I did.
Add chopped butter to HMP and set on speed 1 and temp to 130C and allow the butter to melt, which should only take a minute or so, but the machine won't reach 130C.
When butter is melted, press stop and lift whole lid to add the sweetened condensed milk, brown sugar and glucose syrup, and attach paddle. Close lid and allow to continue to cook on speed 1 until it reaches 130C, this can take 15-20 minutes, but it doesn't matter too much what the time is the HMP will stop when it reaches 130C. Make sure the lid stopper is in place during the whole process. Once it reaches 130C and beeps, add the vanilla extract and let cook for a further 1 minute. The caramel will look like this:
 Actually, I overcooked this just a little, so yours might be a little lighter perhaps or at least not as thick as mine ended up. I cooked it until 134C, but I think stopping at 130C is the best temp, as this is what I did on my previous attempt.
Pour this onto a baking tray that has been lined with baking paper and allow to cool before you pre-cut or put into fridge. Or, you can mix things up a little and do what I did. I know its very fashionable to add salt to your caramel. Personally, I have never consider this an attractive option, but today, I thought I would take the idea on but in my own way.
 While the caramel was cooking I broke up some pretzels with my hands and scattered them over the bottom of the lined baking tray. I also broke up some milk chocolate Cadbury melts, and I also had some Nestle Caramel chips so I spread some of those in as well. I poured the caramel on top of this layer and while the caramel was still hot I scattered more milk choc melts on top. The heat of the caramel melts the chocolate.
 After about 1/2-1 hour, the chocolate is nicely melted and you can start to cut the caramel up into small pieces, but still be careful as it is still quite hot, particularly in the middle. Allow the caramel to continue to cool completely preferably outside of the fridge. Store in an airtight container in your cupboard or fridge.
 My
critics family have praised me on this latest effort and because I have my HMP doing all the hard work for me, I know I can only get better from here. I also can't wait to use this recipe for caramel apples. Rest assured, as soon as I do this, a post will soon follow, because come Halloween and Christmas, I will be doing this in a big way! I haven't been able to master the art, but now I know I can make it work!
**This does make a slightly harder caramel. A change of temp for example, 125C or so could create a slightly softer caramel. A few more attempts and I am sure I have it down pat!!**
All the indgredients used in this recipe can be stored easily in your pantry, making it a perfect food storage recipe. The butter can be fresh and stored in your fridge or you can also use canned butter.
So this evening, I took on my challenge of making better caramel that would make my
This is what I did.
Add chopped butter to HMP and set on speed 1 and temp to 130C and allow the butter to melt, which should only take a minute or so, but the machine won't reach 130C.
When butter is melted, press stop and lift whole lid to add the sweetened condensed milk, brown sugar and glucose syrup, and attach paddle. Close lid and allow to continue to cook on speed 1 until it reaches 130C, this can take 15-20 minutes, but it doesn't matter too much what the time is the HMP will stop when it reaches 130C. Make sure the lid stopper is in place during the whole process. Once it reaches 130C and beeps, add the vanilla extract and let cook for a further 1 minute. The caramel will look like this:

Pour this onto a baking tray that has been lined with baking paper and allow to cool before you pre-cut or put into fridge. Or, you can mix things up a little and do what I did. I know its very fashionable to add salt to your caramel. Personally, I have never consider this an attractive option, but today, I thought I would take the idea on but in my own way.


**This does make a slightly harder caramel. A change of temp for example, 125C or so could create a slightly softer caramel. A few more attempts and I am sure I have it down pat!!**
All the indgredients used in this recipe can be stored easily in your pantry, making it a perfect food storage recipe. The butter can be fresh and stored in your fridge or you can also use canned butter.
Sunday, June 10, 2012
Crio Bru, I love you!! Giveaway

- Rich in antioxidants - by weight cocoa has more than almost any food in the world!
- Low in calories and carbs
- Little to no caffeine
- No fat, sugar or sodium
2.Soak the biscuits and line the base of the deep medium sized rectangular dish
3.Whip 600mls of thickened cream in HMP with paddle attachment a teaspoon of sugar and seeds scraped from one large vanilla bean. Use speed 3 for 45 secs. Check consistency and if not thick and stiff peaks, do 10 secs at a time. Divide cream into thirds and add sifted cocoa powder to one third and mix through.
4. Spread one lot of vanilla cream on first layer of soaked biscuits.
5. Layer soaked biscuits on top of vanilla cream.
6. Spread chocolate cream on biscuits.
7. Add another layer of soaked biscuits.
8. Finally spread remaining vanilla cream and sprinkle with sifted with quality cocoa powder.

So if you are intrigued by Crio Bru and want to give it a try, you can head over to the Crio Bru Australian website to find out more and order your own. Otherwise you can try your luck by entering my giveaway. All you have to do is:
- 'Like' Crio Bru Oz Facebook page and COMMENT that "FoodMuster sent me" and you will be in the draw for a small pack of Crio Bru.
- **If you don't comment you won't be in the draw**
- If you are already a fan, leave a comment saying, "FoodMuster is awesome"! Haha!! Just joking!! If you leave a comment saying you wish to enter 'FoodMuster's Crio Bru Giveaway' that will be fine.
- This giveaway is open to Australian addresses only and please only leave one comment, multiples will not be included.
- There are 3 bags of Crio Bru to giveaway. Winners will be announced here and on the Crio Bru Facebook page. Good Luck
Almost Vege Burgers - Bacon Added!!
I call these almost vege burgers because, while the majority of the ingredients are vegetables, there is a small amount of bacon in them. I had to add the bacon, so that my kids would give them a go. Unfortunately, not all my kids thought that was enough:(. One of my sons felt there was far to much green in them, so would not go anywhere near them. My daughter and my youngest son ate them and gave them a thumbs up, my other son, felt there was not enough meat in them, so again wouldn't go near them! Well, you win some, you lose some! Personally, I love them and my HMP came in handy to make them in a short period of time.

1 Carrot chopped in three
1 Capsicum roughly chopped
1/2 large red onion roughly chopped
1 broccoli
1 handful of baby spinach
5 mushrooms
1/2 tablespoon of chopped/minced garlic
5 pieces short cut bacon chopped, cooked and cooled
1 egg
1 cup flour
1/2 cup bread crumbs
Salt and pepper to taste
1. In HMP add above vegetables and chop on speed 6 for 10 secs.
2. Add egg, flour, crumbs, bacon, and salt and pepper to taste. Speed 1 for 15-20 secs. Make sure you check consistency, you may need to add a little more flour should the mixture not keep together. Add to a clean bowl.

3. Roll mixture into palm size balls (or bigger if you like) pat out into patties and refrigerate for at least 15 minutes.
4. Heat frying pan to med/high or Teppenyaki pan if you have one. Spray with oil and cook until brown, turn and cook other side until brown.Repeat with remaining burgers.
Serve with salad or on burger buns. These are really good the next on a sandwich or even on their own. For the chilli fans, you could add a fresh red or green chilli in step one or dried chilli to taste in step one.

Saturday, June 2, 2012
Mexican Fiesta, Ole!!
I recently watch a Food Planet documentary on Mexico and watched the vanilla episode of Spice Trail(Kate Humble)series on SBS, which helped me fall further in love with Mexico. Now I want to visit one day to experience the flavours and smells I swear I almost sensed via my TV screen. Portrayed correctly, its an amazing place full of history and exotic flavours that I can't wait to absorb and devour one day. Until then, I have to make do with what I can re-create in my own kitchen. A couple of weeks ago I pitched an idea to The Soup team to host an authentic Mexican dinner party to help promote the amazing new Delicious Simply the Best Cookbook by Valli Little. I was ecstatic when they chose me, because now I have an excuse to make the recipes that have been tempting my senses for so long.

As fate would have it though, dates and times clashed not only with my calendar but the calendars of my friends, so my Mexican extravaganza was no longer the larger than life affair that I hoped it would be. None-the-less, the show went with my faithful friends that could make it. With the theme of the night in mind decided on the Chilli for a crowd found on page, 230.

I must say it is not authentic Mexican more an interpretation with ingredients from different cultures added, so if you like, a 'Multicultural Chilli'. It was a great base for the delicious authentic salsa and guacamole that I made. All I can say people, is lime and coriander or cilantro for our American friends is the perfect ingredient companions that make the relationship of true Mexican guacamole last forever!
I also slow cooked some chicken breasts in lime, cummin, salt, and pepper, garlic,and coriander. I then pulled the meat apart so it looked a little like it had been shredded. This also was used as a base for the toppings.

Mexican Guacamole
Naturally, my HMP came in handy when make the guacamole. All I needed was 1/2 large onion roughly chopped, 3 avocados, 2 limes juiced, 1 large green chilli with seeds removed (can leave seeds in if you prefer) and fresh coriander.
Add to the HMP on speed 5 for 20 secs. Then add the paddle attachment and whizz again on speed 3 for 10 secs to whip it up. Serve immediately or put in fridge. This really should be one of the last things you make just before serving.
If you don't have an HMP or any Thermal mixer for that matter, use your food processor.

Mexican Salsa
5 tomatoes chopped neatly
bunch coriander chopped roughly
2 medium onions chopped finely
1 lime juiced
season with salt and pepper
Add altogether in bowl, mix through and refrigerate until required.

Mexcian Layer dip
I am so in love with this dip. I think the first time I ever tried it was when I was about 14 or 15 at a family gathering. A friend of my mum's had recently returned from trip to the US and ate the dip at a friend's place. She share the recipe with my mum and once I got my hands on it, I made it heaps and heaps over the years. In fact, its a popular request from family members for me to bring to get togethers. The last time I made it though, I felt it was a little bland and I must have forgotten an ingredient. So this time round, I searched far and wide for something just like it, but it a kick or two! I discovered The Pioneer Woman's recipe. While I didn't use all the same ingredients (do I ever?!) I felt that her recipe was the best inspiration. Here is what I did:
1 can Refried beans
1/4 cup pickeled jalapeno peppers (I used Old Elpaso brand) chopped.
1-2 tablespoons of juice from the jalapeno peppers
1 cup of mexican salsa from above recipe
1-2 cups Guacamole from above recipe - amount depends on dish used, but see photos
Sour Cream
Grated Cheese - try using mexican blend cheese - Kraft does one and you can also get a good one from Costco
Good handful of coriander (cilantro)
1 tsp ground cummin
Method
1. Pour/ scoop out refried beans into a fry pan on medium heat.
2. Add jalapeno juice and cummin and mix around until combined and smooth and mix through chopped jalapeno peppers.
3.Spoon into pie dish (any shallow dish can be used, but not too big)
4. Layer with cheese
5. Add salsa and then guacamole
6. Finish with sour cream and coriander
Serve with corn chips of choice. Its so delicious and such an easy side.


Dessert: Crio Bru-masu!

I was inspired by the Chocolate-chip tiramasu found on page 196. I don't drink coffee and none of my guests are coffee drinkers either, strange to some I am sure. However we do love our chocolate so I turned to the delectable flavours of the rich and fruity Crio Bru, Vega Real, as my chocolatey drink to soak the savoiardi or ladyfinger biscuits.
After I brewed the Crio Bru in the Hotmix Pro, I added some sugar/stevia so it had a light sweetness to it. I then soaked the biscuits and lined the base of the deep rectangular dish and spread on top the vanilla cream, then the biscuits with chocolate cream on top, then more soaked biscuits and finally vanilla cream with a sprinkling of cocoa powder. The vanilla cream was made with a vanilla pod and a little bit of sugar. The chocolate cream was the same but with a tablespoon of cocoa powder sifted and whipped through the vanilla cream. I could have quite easily mixed mascarpone or ricotta through the cream, but I didn't have any on hand. I have used ricotta in the past.
 In hind sight, I think I would have preferred to brew the Crio Bru in full milk rather than water and add milk to it afterward, I think it would have given it a much richer and creamier taste. So keep this in mind if you want to make it and I will do this when I make it next:)

As fate would have it though, dates and times clashed not only with my calendar but the calendars of my friends, so my Mexican extravaganza was no longer the larger than life affair that I hoped it would be. None-the-less, the show went with my faithful friends that could make it. With the theme of the night in mind decided on the Chilli for a crowd found on page, 230.
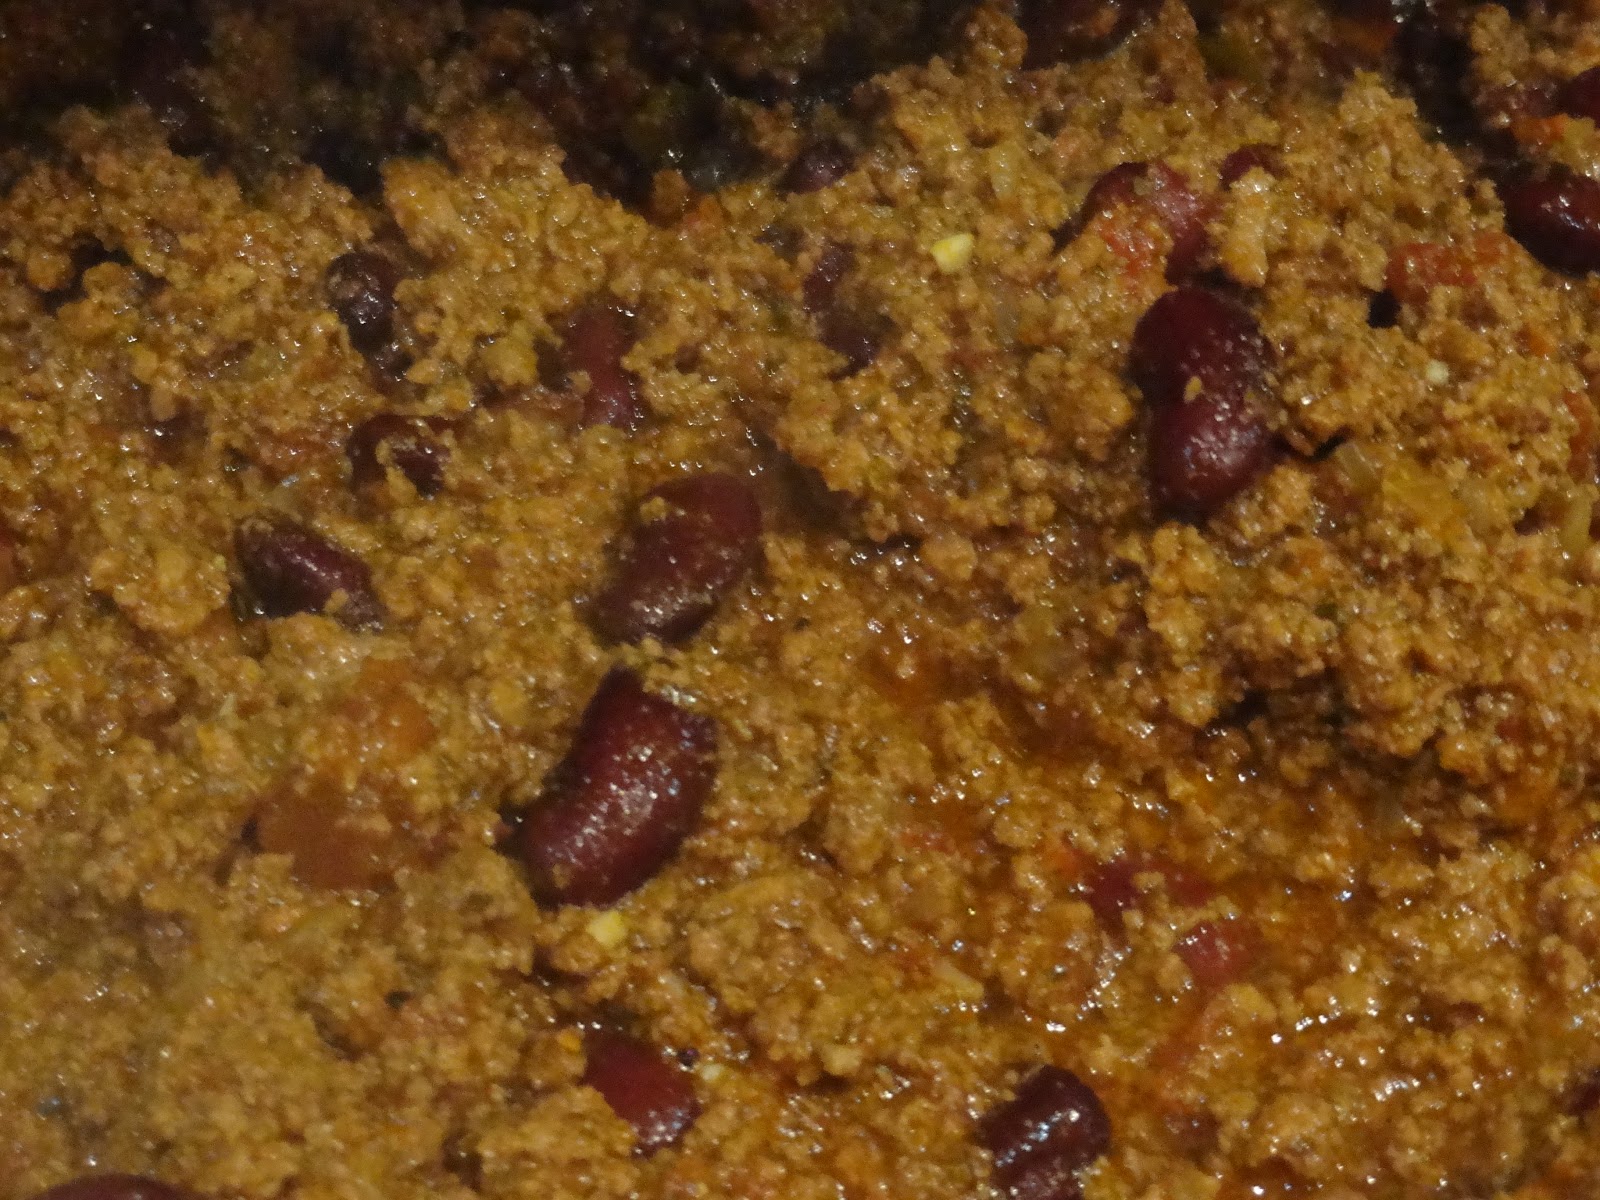
I must say it is not authentic Mexican more an interpretation with ingredients from different cultures added, so if you like, a 'Multicultural Chilli'. It was a great base for the delicious authentic salsa and guacamole that I made. All I can say people, is lime and coriander or cilantro for our American friends is the perfect ingredient companions that make the relationship of true Mexican guacamole last forever!
I also slow cooked some chicken breasts in lime, cummin, salt, and pepper, garlic,and coriander. I then pulled the meat apart so it looked a little like it had been shredded. This also was used as a base for the toppings.

Mexican Guacamole
Naturally, my HMP came in handy when make the guacamole. All I needed was 1/2 large onion roughly chopped, 3 avocados, 2 limes juiced, 1 large green chilli with seeds removed (can leave seeds in if you prefer) and fresh coriander.
Add to the HMP on speed 5 for 20 secs. Then add the paddle attachment and whizz again on speed 3 for 10 secs to whip it up. Serve immediately or put in fridge. This really should be one of the last things you make just before serving.
If you don't have an HMP or any Thermal mixer for that matter, use your food processor.

Mexican Salsa
5 tomatoes chopped neatly
bunch coriander chopped roughly
2 medium onions chopped finely
1 lime juiced
season with salt and pepper
Add altogether in bowl, mix through and refrigerate until required.

Mexcian Layer dip
I am so in love with this dip. I think the first time I ever tried it was when I was about 14 or 15 at a family gathering. A friend of my mum's had recently returned from trip to the US and ate the dip at a friend's place. She share the recipe with my mum and once I got my hands on it, I made it heaps and heaps over the years. In fact, its a popular request from family members for me to bring to get togethers. The last time I made it though, I felt it was a little bland and I must have forgotten an ingredient. So this time round, I searched far and wide for something just like it, but it a kick or two! I discovered The Pioneer Woman's recipe. While I didn't use all the same ingredients (do I ever?!) I felt that her recipe was the best inspiration. Here is what I did:
1 can Refried beans
1/4 cup pickeled jalapeno peppers (I used Old Elpaso brand) chopped.
1-2 tablespoons of juice from the jalapeno peppers
1 cup of mexican salsa from above recipe
1-2 cups Guacamole from above recipe - amount depends on dish used, but see photos
Sour Cream
Grated Cheese - try using mexican blend cheese - Kraft does one and you can also get a good one from Costco
Good handful of coriander (cilantro)
1 tsp ground cummin
Method
1. Pour/ scoop out refried beans into a fry pan on medium heat.
2. Add jalapeno juice and cummin and mix around until combined and smooth and mix through chopped jalapeno peppers.
3.Spoon into pie dish (any shallow dish can be used, but not too big)
4. Layer with cheese
5. Add salsa and then guacamole
6. Finish with sour cream and coriander
Serve with corn chips of choice. Its so delicious and such an easy side.


Dessert: Crio Bru-masu!
I was inspired by the Chocolate-chip tiramasu found on page 196. I don't drink coffee and none of my guests are coffee drinkers either, strange to some I am sure. However we do love our chocolate so I turned to the delectable flavours of the rich and fruity Crio Bru, Vega Real, as my chocolatey drink to soak the savoiardi or ladyfinger biscuits.
After I brewed the Crio Bru in the Hotmix Pro, I added some sugar/stevia so it had a light sweetness to it. I then soaked the biscuits and lined the base of the deep rectangular dish and spread on top the vanilla cream, then the biscuits with chocolate cream on top, then more soaked biscuits and finally vanilla cream with a sprinkling of cocoa powder. The vanilla cream was made with a vanilla pod and a little bit of sugar. The chocolate cream was the same but with a tablespoon of cocoa powder sifted and whipped through the vanilla cream. I could have quite easily mixed mascarpone or ricotta through the cream, but I didn't have any on hand. I have used ricotta in the past.

Friday, May 4, 2012
HotMix Pro Recipes: Kingston Truffles, perfect for Mother's Day
One of my most favouritist and easiest sweets I like to make that is always a crowd pleaser is Oreo truffles. Everyone loves them and I so wish that I invented them, but alas its a borrowed idea and basically I make them over and over using my favourite cream biscuits, because naturally I unfortunately have many of them!

I particularly enjoy the Arnott's Kingston. This chocolate cream is sandwiched with what can only be described as mini butternut biscuits. Many of us know that butternuts are perfect for a no bake base for cheesecakes and other slices. So why not use them for a truffle?
What you will need:
2 packets Kingstons
125g Philly cream cheese
200g quality chocolate ( I used Cadbury melts)
Method
1. Put Kingstons in HMP with blades on speed 8 for 20 secs.
2. Add cream cheese and mix with blades on speed 5 for 20 secs. Scrape sides and mix a further 15-20 secs or until mixture is smooth and creamy.
3. Leave mixture in bowl if you want and refrigerate for 20 minutes or freezer for about 10mins.
4. Using a spoon roll mixture in balls and put into either mini muffin trays or on baking tray. Put back into fridge or freezer while you melt chocolate.
5. I use mini muffin trays as I find these easy to keep the truffle where I want it and its easy to cover them with chocolate. I use a spoon to drop chocolate over the biscuit balls. Otherwise you can use a skewer and dip balls in chocolate. Refrigerate until set.
Store truffles in a container with a lid in refrigerator for up to 7 days or freeze.
These are easy to make and would make a perfect treat for your mum! Best of all, you can make these truffles with any kind of biscuit, but cream biscuits are best:) Enjoy!
HotMix Pro Recipes: PB n Caramel Choc Cream Pie
One thing that I particularly like about this recipe is that I didn't clean out the bowl once after each step. Each layer of this pie has flavours that marry well, so I didn't feel the need to concern myself with cleaning the bowl. Its up to you, but try it out if you like.
Ever since watching "The Help" I have been a little obsessed with searching for pie recipes and making pies. If you have seen the movie or read the book, you can smile with me as you remember the classic line of Minnie's, "Eat, my, Sh*$!!". I crack up each time I picture it in my head. I suppose you could say I was inspired by the chocolate pie fiasco a little with this recipe I concocted. I actually mixed up a lot of things that I have discovered along the way of my pie searching. Of course you can make this recipe without a HMP, but the HMP just makes it that much easier and quicker. You also get an amazing consistency with the HMP. So here is what I did.
Base Ingredients
1 packet digestive biscuits
1 cup pretzels
130g butter melted
1 tbsp peanut butter
Filling
1 can caramel top and fill
100g cream cheese
1-2 tbsp peanut butter ( peanut butter is optional but is a great flavour)
1 tbsp gelatin or 1 packet
400ml hot water to dissolve gelatin
Topping
200ml cream
1tbsp quality cocoa
1 tbsp icing sugar
Method
1. Biscuits and pretzels on speed 5 for 20 secs
2. Add melted butter and peanut butter and mix on speed 2 for 30 secs
3. Press into pie dish and refrigerate.
4. Mix can caramel, cream cheese with paddle attachment on speed 2 for 20 secs. Scrape sides and remove paddle attachment. Add peanut butter and mix on speed 3 for 30 seconds
5. Mix gelatin in hot water with a fork and mix well.
6. Add gelatin to caramel mix and mix on speed 1 for 20 secs
7. Pour caramel mixture into pie dish and put back in fridge for at least 2 hours.
8. When caramel layer is set mix cream, cocoa, and icing sugar using paddle attachment on speed 3 for around 1 minute or until it has stiff peaks.
9. Spread over pie.
 The pretzels and peanut butter add the right amount of salt to balance out the sweetness of the other ingredients. Its a really great dessert that can be made in the morning or afternoon and be ready for the evening. All ingredients can be stored in your pantry, even the cream! Yes you can get UHT cream, but make sure you refrigerate the cream for at least 1 hour before you whip it or it won't whip.
Ever since watching "The Help" I have been a little obsessed with searching for pie recipes and making pies. If you have seen the movie or read the book, you can smile with me as you remember the classic line of Minnie's, "Eat, my, Sh*$!!". I crack up each time I picture it in my head. I suppose you could say I was inspired by the chocolate pie fiasco a little with this recipe I concocted. I actually mixed up a lot of things that I have discovered along the way of my pie searching. Of course you can make this recipe without a HMP, but the HMP just makes it that much easier and quicker. You also get an amazing consistency with the HMP. So here is what I did.
Base Ingredients
1 packet digestive biscuits
1 cup pretzels
130g butter melted
1 tbsp peanut butter
Filling
1 can caramel top and fill
100g cream cheese
1-2 tbsp peanut butter ( peanut butter is optional but is a great flavour)
1 tbsp gelatin or 1 packet
400ml hot water to dissolve gelatin
Topping
200ml cream
1tbsp quality cocoa
1 tbsp icing sugar
Method
1. Biscuits and pretzels on speed 5 for 20 secs
2. Add melted butter and peanut butter and mix on speed 2 for 30 secs
3. Press into pie dish and refrigerate.
4. Mix can caramel, cream cheese with paddle attachment on speed 2 for 20 secs. Scrape sides and remove paddle attachment. Add peanut butter and mix on speed 3 for 30 seconds
5. Mix gelatin in hot water with a fork and mix well.
6. Add gelatin to caramel mix and mix on speed 1 for 20 secs
7. Pour caramel mixture into pie dish and put back in fridge for at least 2 hours.
8. When caramel layer is set mix cream, cocoa, and icing sugar using paddle attachment on speed 3 for around 1 minute or until it has stiff peaks.
9. Spread over pie.

Monday, April 16, 2012
HotMixPro Review Part 3, The Recipes
Hi to all! I have finally organised some time to get some recipes up. As I mentioned in my last post, I will gradually add recipes so please check back often. Now you will have to forgive me for some of the photos I will be posting. Not too long ago, I took a drink from my water bottle and put it back in my handbag, to discover a couple of minutes later that I hadn't screwed the lid back on properly and a good 400ml of water was trapped in my bag and pretty much everything except my purse got destroyed, including my much loved digital camera:( So I was very upset about that but more so because I could only blame myself, which was upsetting!!! Anyway, I have been taking some pictures on my Iphone 3 which isn't the best, until I either get a new one or borrow my mums, which ever comes first!!
I have really got used to using my HMP and it really is an amazing machine. There are some appliances that I haven't touch since I started using my HMP, which really goes to show how versatile the machine is.
The first recipe I want to share with you really shows how amazing the HMP Gastro model really is. A lot of people ask me why I would want a cooking machine that goes up to 190C, what is the point? Well, if you have ever stood at stove stirring constantly to make caramels, or toffee, or caramel for caramel popcorn, or praline for that matter, you will love what you can achieve with the HMP Gastro. Not only do you not have to stand at your stove top stirring consistantly and constantly, you also don't have to concern yourself with a cany thermometer or if you don't use one of those, you don't have to worry about when you reach soft, or hard crack stage or worry about burning anything because its all done for you in the machine. Set the temp, the speed and then walk away, its that simple!
Honey Comb
1 1/2 cups (335g) white sugar
| ||
1/2 cup (125ml) honey
| ||
1/3 cup (80ml) water
| ||
2 tbs golden syrup
| ||
2 tsp bicarbonate of soda
| ||
200g dark chocolate, chopped
Line deep dish tray with baking paper
full cooking time the toffee won't crystalise properly and it will be useless.
* 'Wait temp' basically means that you set the tempature you want the mixture to reach and the machine will gradually reach that tempature and then the machine will stop.

2. Pour mixture into a stainless steel bowl and add the bicarb of soda and mix with a wooden spoon and make sure it is mixed well but quickly.
3. Pour into the prepared tray and leave to cool which can take up to a couple of hours.

4. Melt chocolate and pour over honey comb and smooth over top. Once it sets, break honey comb into pieces and enjoy.

I personally didn't add chocolate, our family love it without:)
Its so simple to do and takes very little time. Its perfect for a treat or to make up for a gift:)
The next recipe is the answer to a lot of mum's prayers on how to get the kids to eat veges. I have made this for my kids several times now and not once have they asked me what I put in it. So for me its a winner!!
Vegeful Spaghetti Bologanese
1 carrot
1 capsicum
1/2 red onion
1/2 tbs minced garlic
1 zuccini
1 tomato
250g lean minced beef, or pork, or chicken
1 jar tomato pasta sauce
salt and pepper to taste
500g pasta cooked seperately to packet directions
grated cheese
Directions
1. Chop each of the vegetables into a couple of pieces and add to machine with garlic and chop on speed 4
for 10 secs. You can cook the pasta at this stage.
2. Add a small amount of oil and cook on 70C using speed 1 for about 2 mins.
3. Break up mince and add to machine and cook on speed 1, 85C for about 15mins.
4. Add jar of tomato pasta, salt and pepper, and mix through on speed 2 for 2 minutes on 85C.

3. Add bologanse to pasta and top with cheese and serve. Its a winner and you can clean up while it cooks!

You can add any kind of vegetables you like. For our big family, I actually make this up with 400-500g of mince and it makes
enough for the meal and left overs.
That's it for now, but stay tuned for more recipes:)
| ||
Subscribe to:
Posts (Atom)
